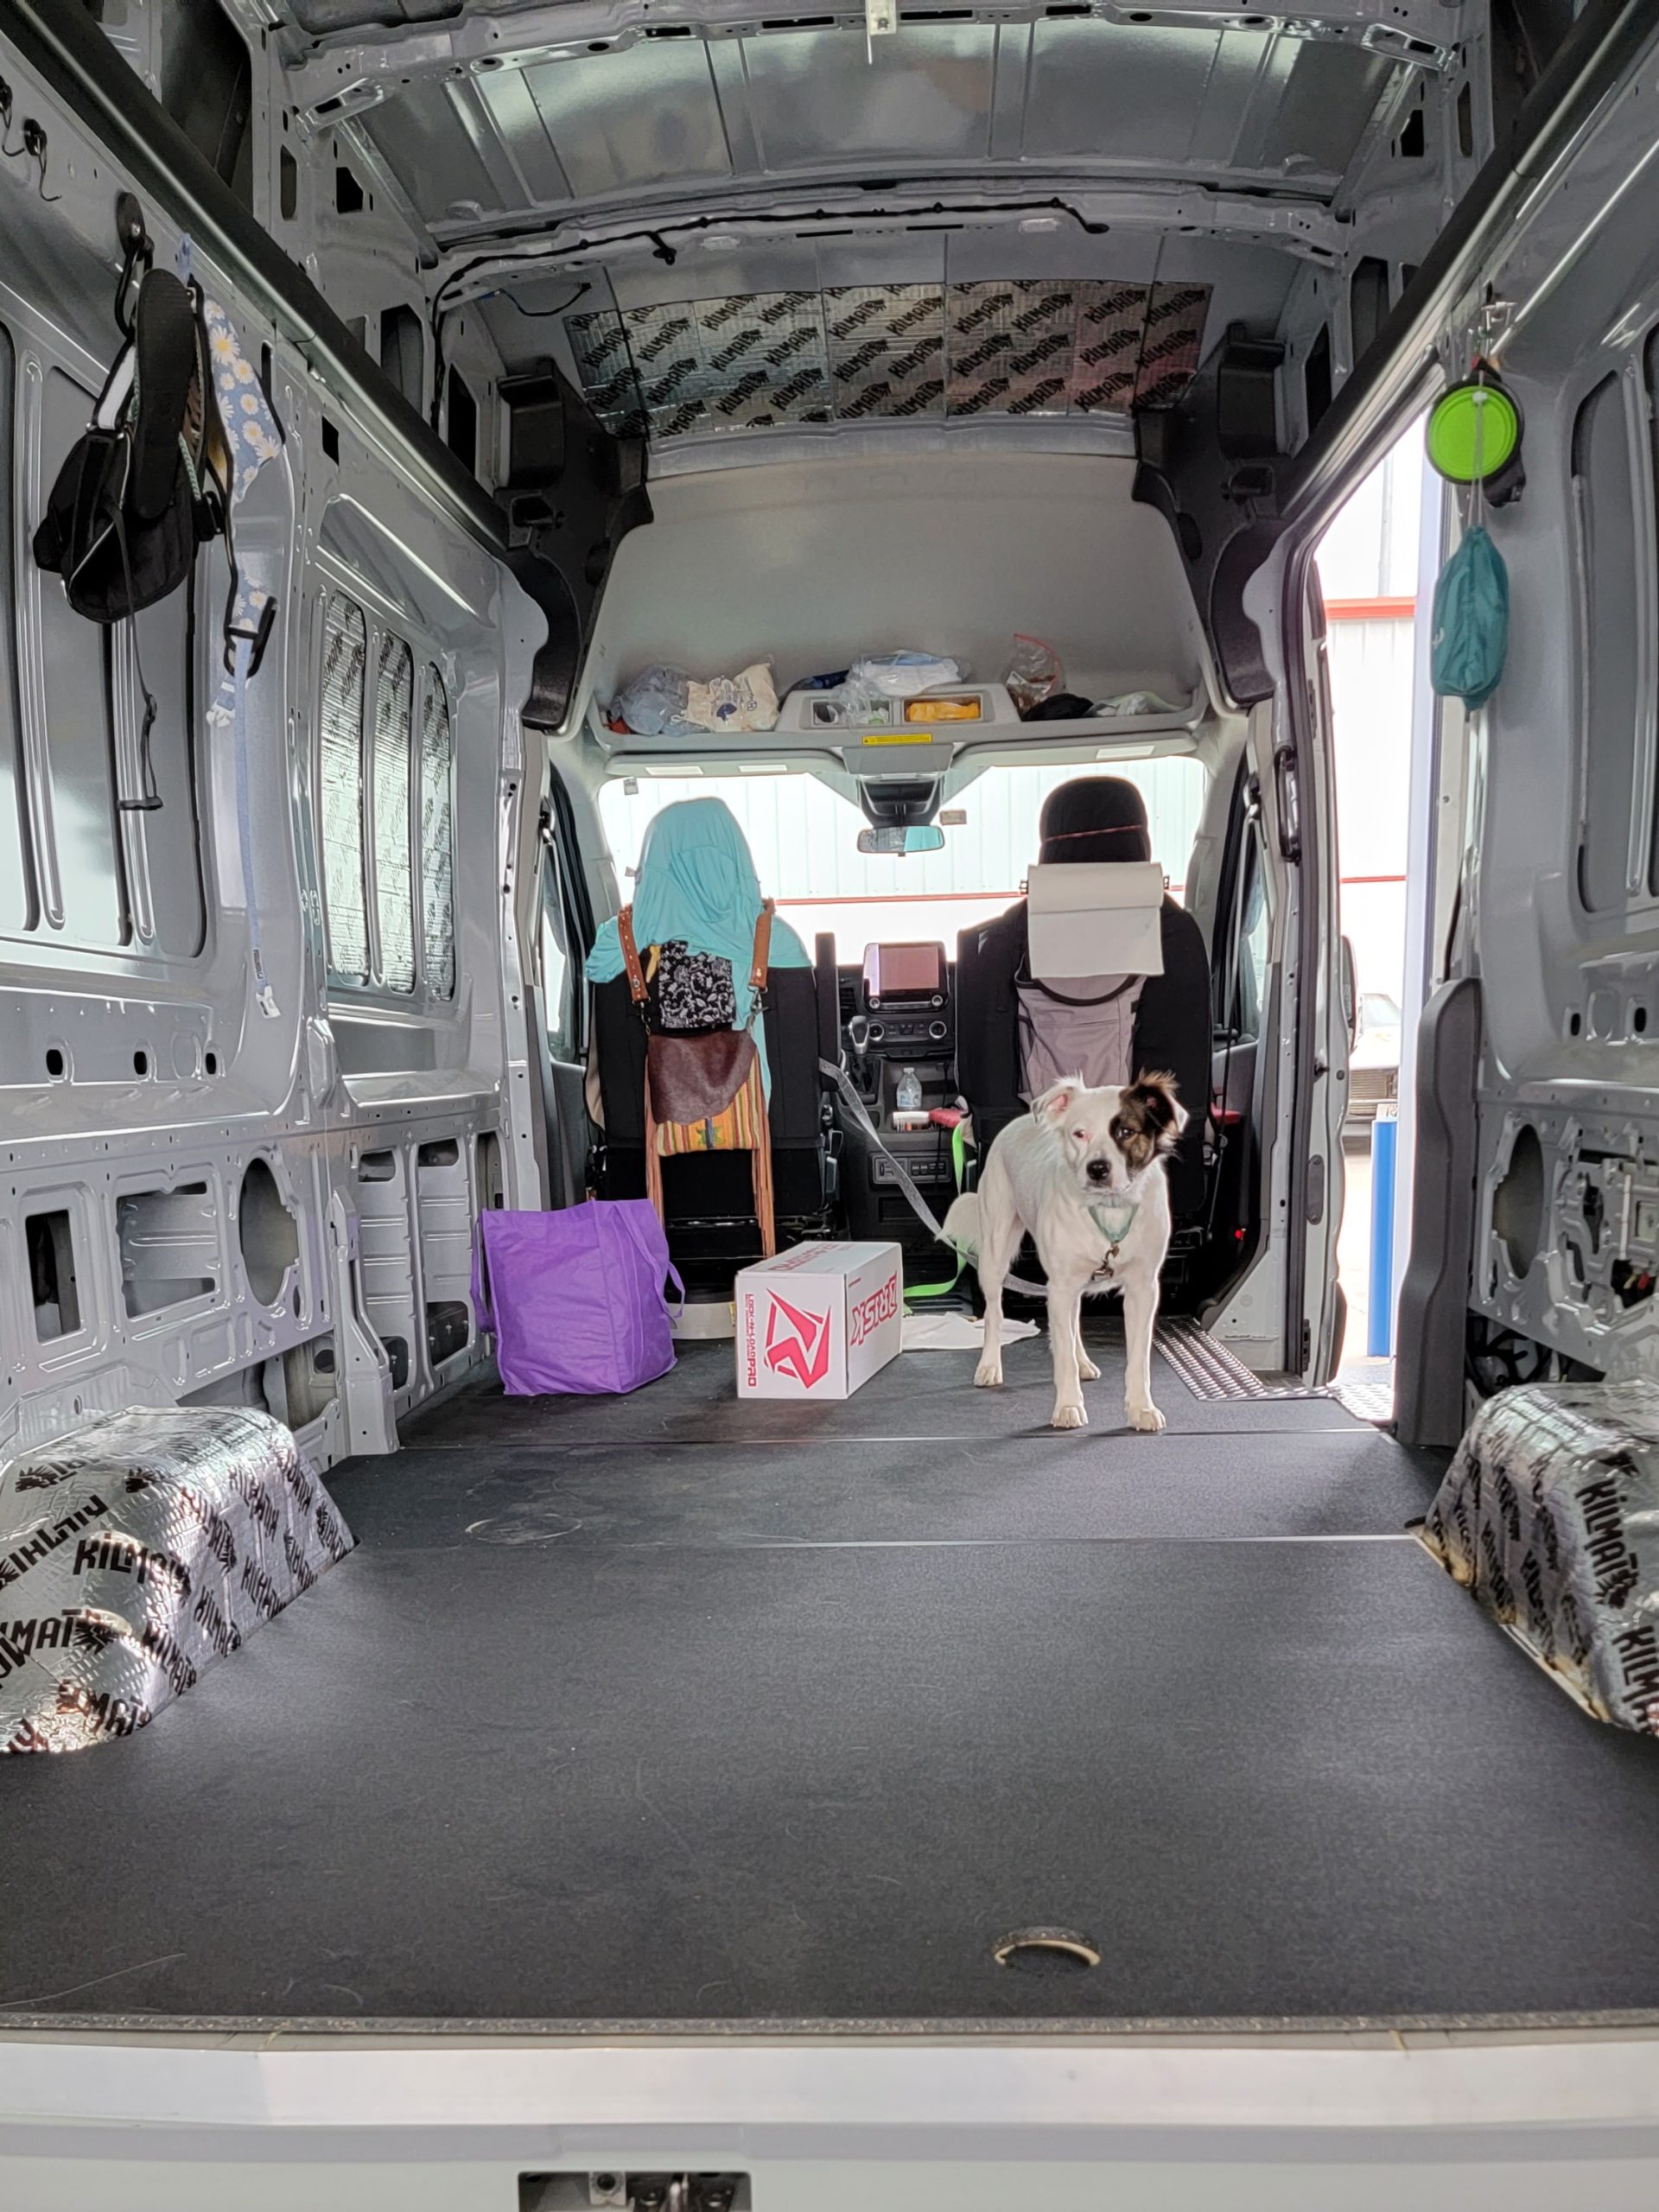
Cavernous! Yep, that pretty much described my 2021 Ford Transit Cargo as I stood inside the cargo area for the first time. Lots of room…and lots of work ahead. The first item of business will be the camper van floor.
Camper and a Toy Hauler
This van is to serve dual purpose as a camper and a toy hauler. Imagining waking up to a sunrise over the ocean when camping on the beach was ample motivation to get started. Despite spending a lot of time in Texas I found the premier source for Transit vans in Kansas City, Missouri. If you are in the market for a Transit be sure to visit Rusty Jardin and Ed Bowers at Gary Crossley Ford!
While I had dreams of cabinets, a sink and a comfy bed, the priority was – “How do I load my dirt bikes?” After all, a girl has to keep her priorities! The camper van floor would be integral to the overall design of this van.
Shout out to Rob at Beckwith’s Car Care for ongoing help, ideas and patience!
Toy Hauler – camper van floor with hidden moto mounts
I’d already hauled one of the bikes in the van using traditional tie downs. The tie downs took up more space than the bike and left no room for moving around the van interior. The best solution to ditch the tiedowns was Risk Racing’s Lock-N-Load system.
After mind fogging quantities of Youtube videos, an awesome visit to a Vanarchy event in Arkansas and some contemplations that left my blonde brain cells burning – my plan was born.
A van floor that was insulated and would cover up dirt bike mounts.
Insulation for camping and moto mounts for dirt bikes
Two primary factors led to the floor design that I selected.
- Insulation from cold under the vehicle winter breezes. With prior experience camping in everything from tents to cargo trailers, the importance of floor insulation was evident.
- The final floor needed to be free of trip hazards, but still needed to have a way to secure a dirt bike.
Dirt bikes as priority #1 – Moto Mounts
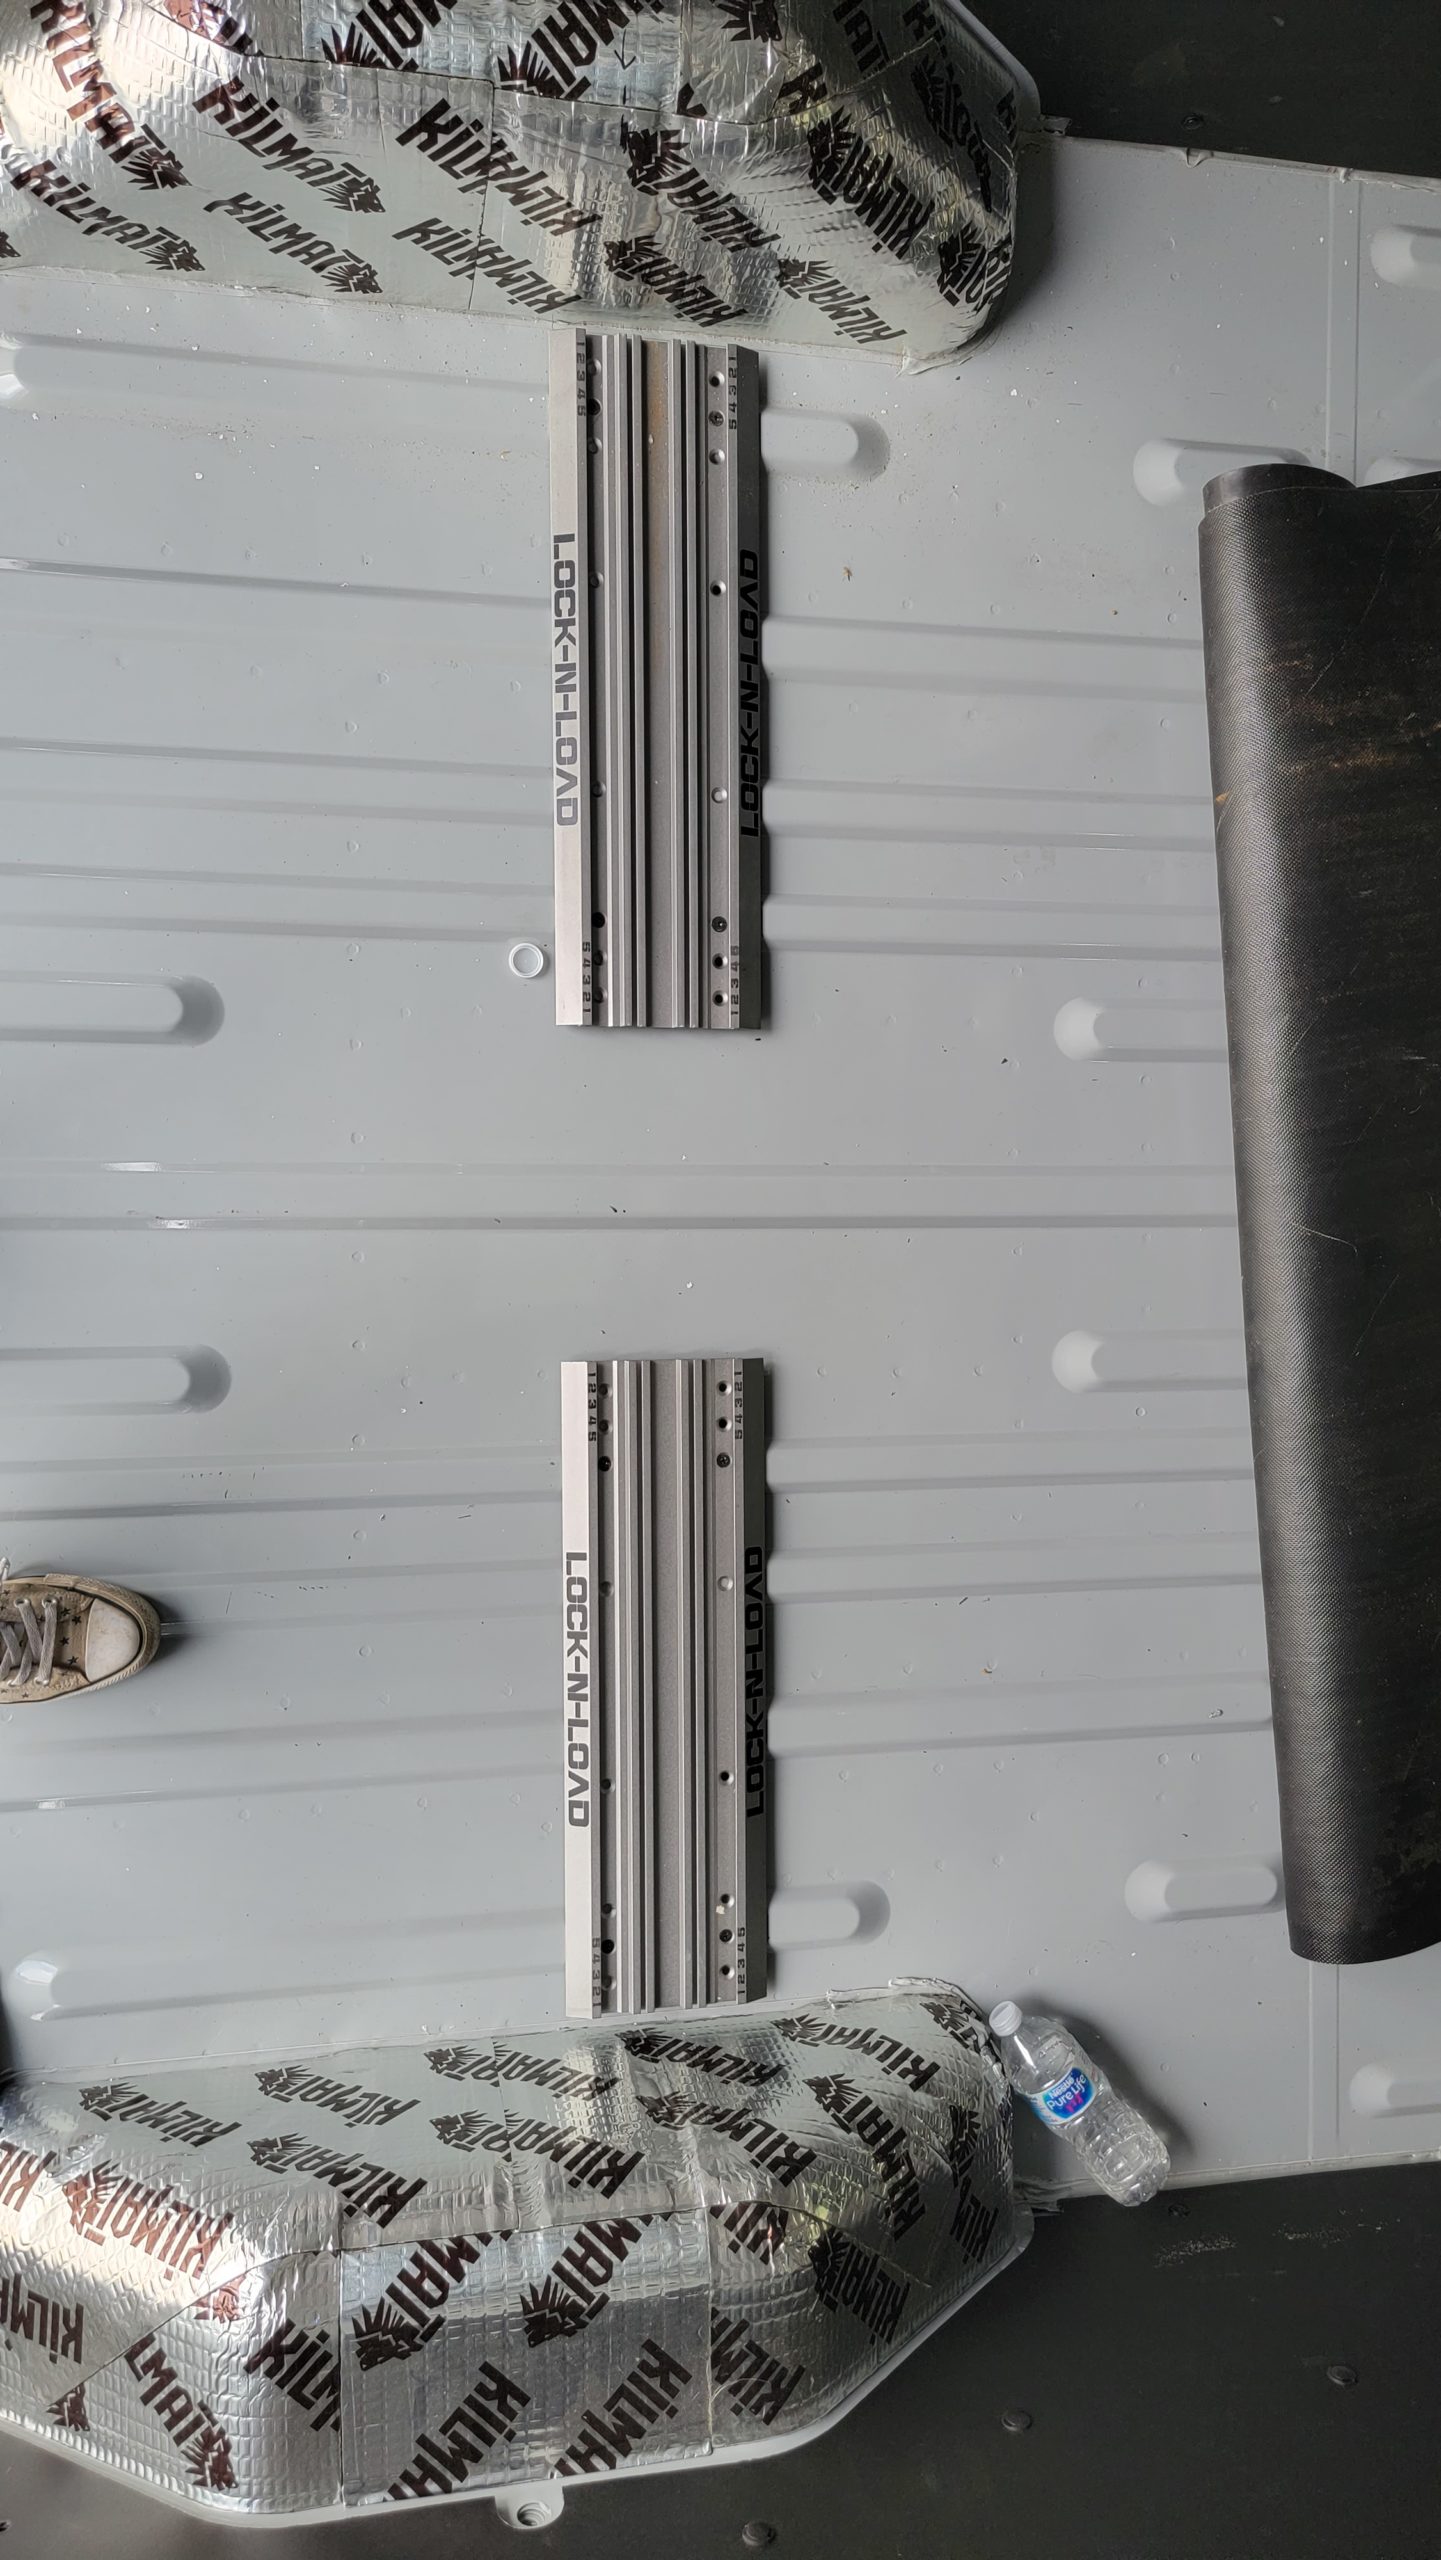
Risk Racing Lock and Load foot peg moto mounts
The Risk Racing Lock and Load dirt bike anchors presented an expensive, but efficient way to secure the bikes, avoid tie downs crisscrossing the living space and to have them disappear when not hauling the bikes (or after the bikes are unloaded at a camp site).
Note: These will not work for bikes that weigh more than 300 lbs. (Sorry big bike riders).
Even though my bikes are small and fairly light it was important to mount the Risk Racing equipment securely to the van.
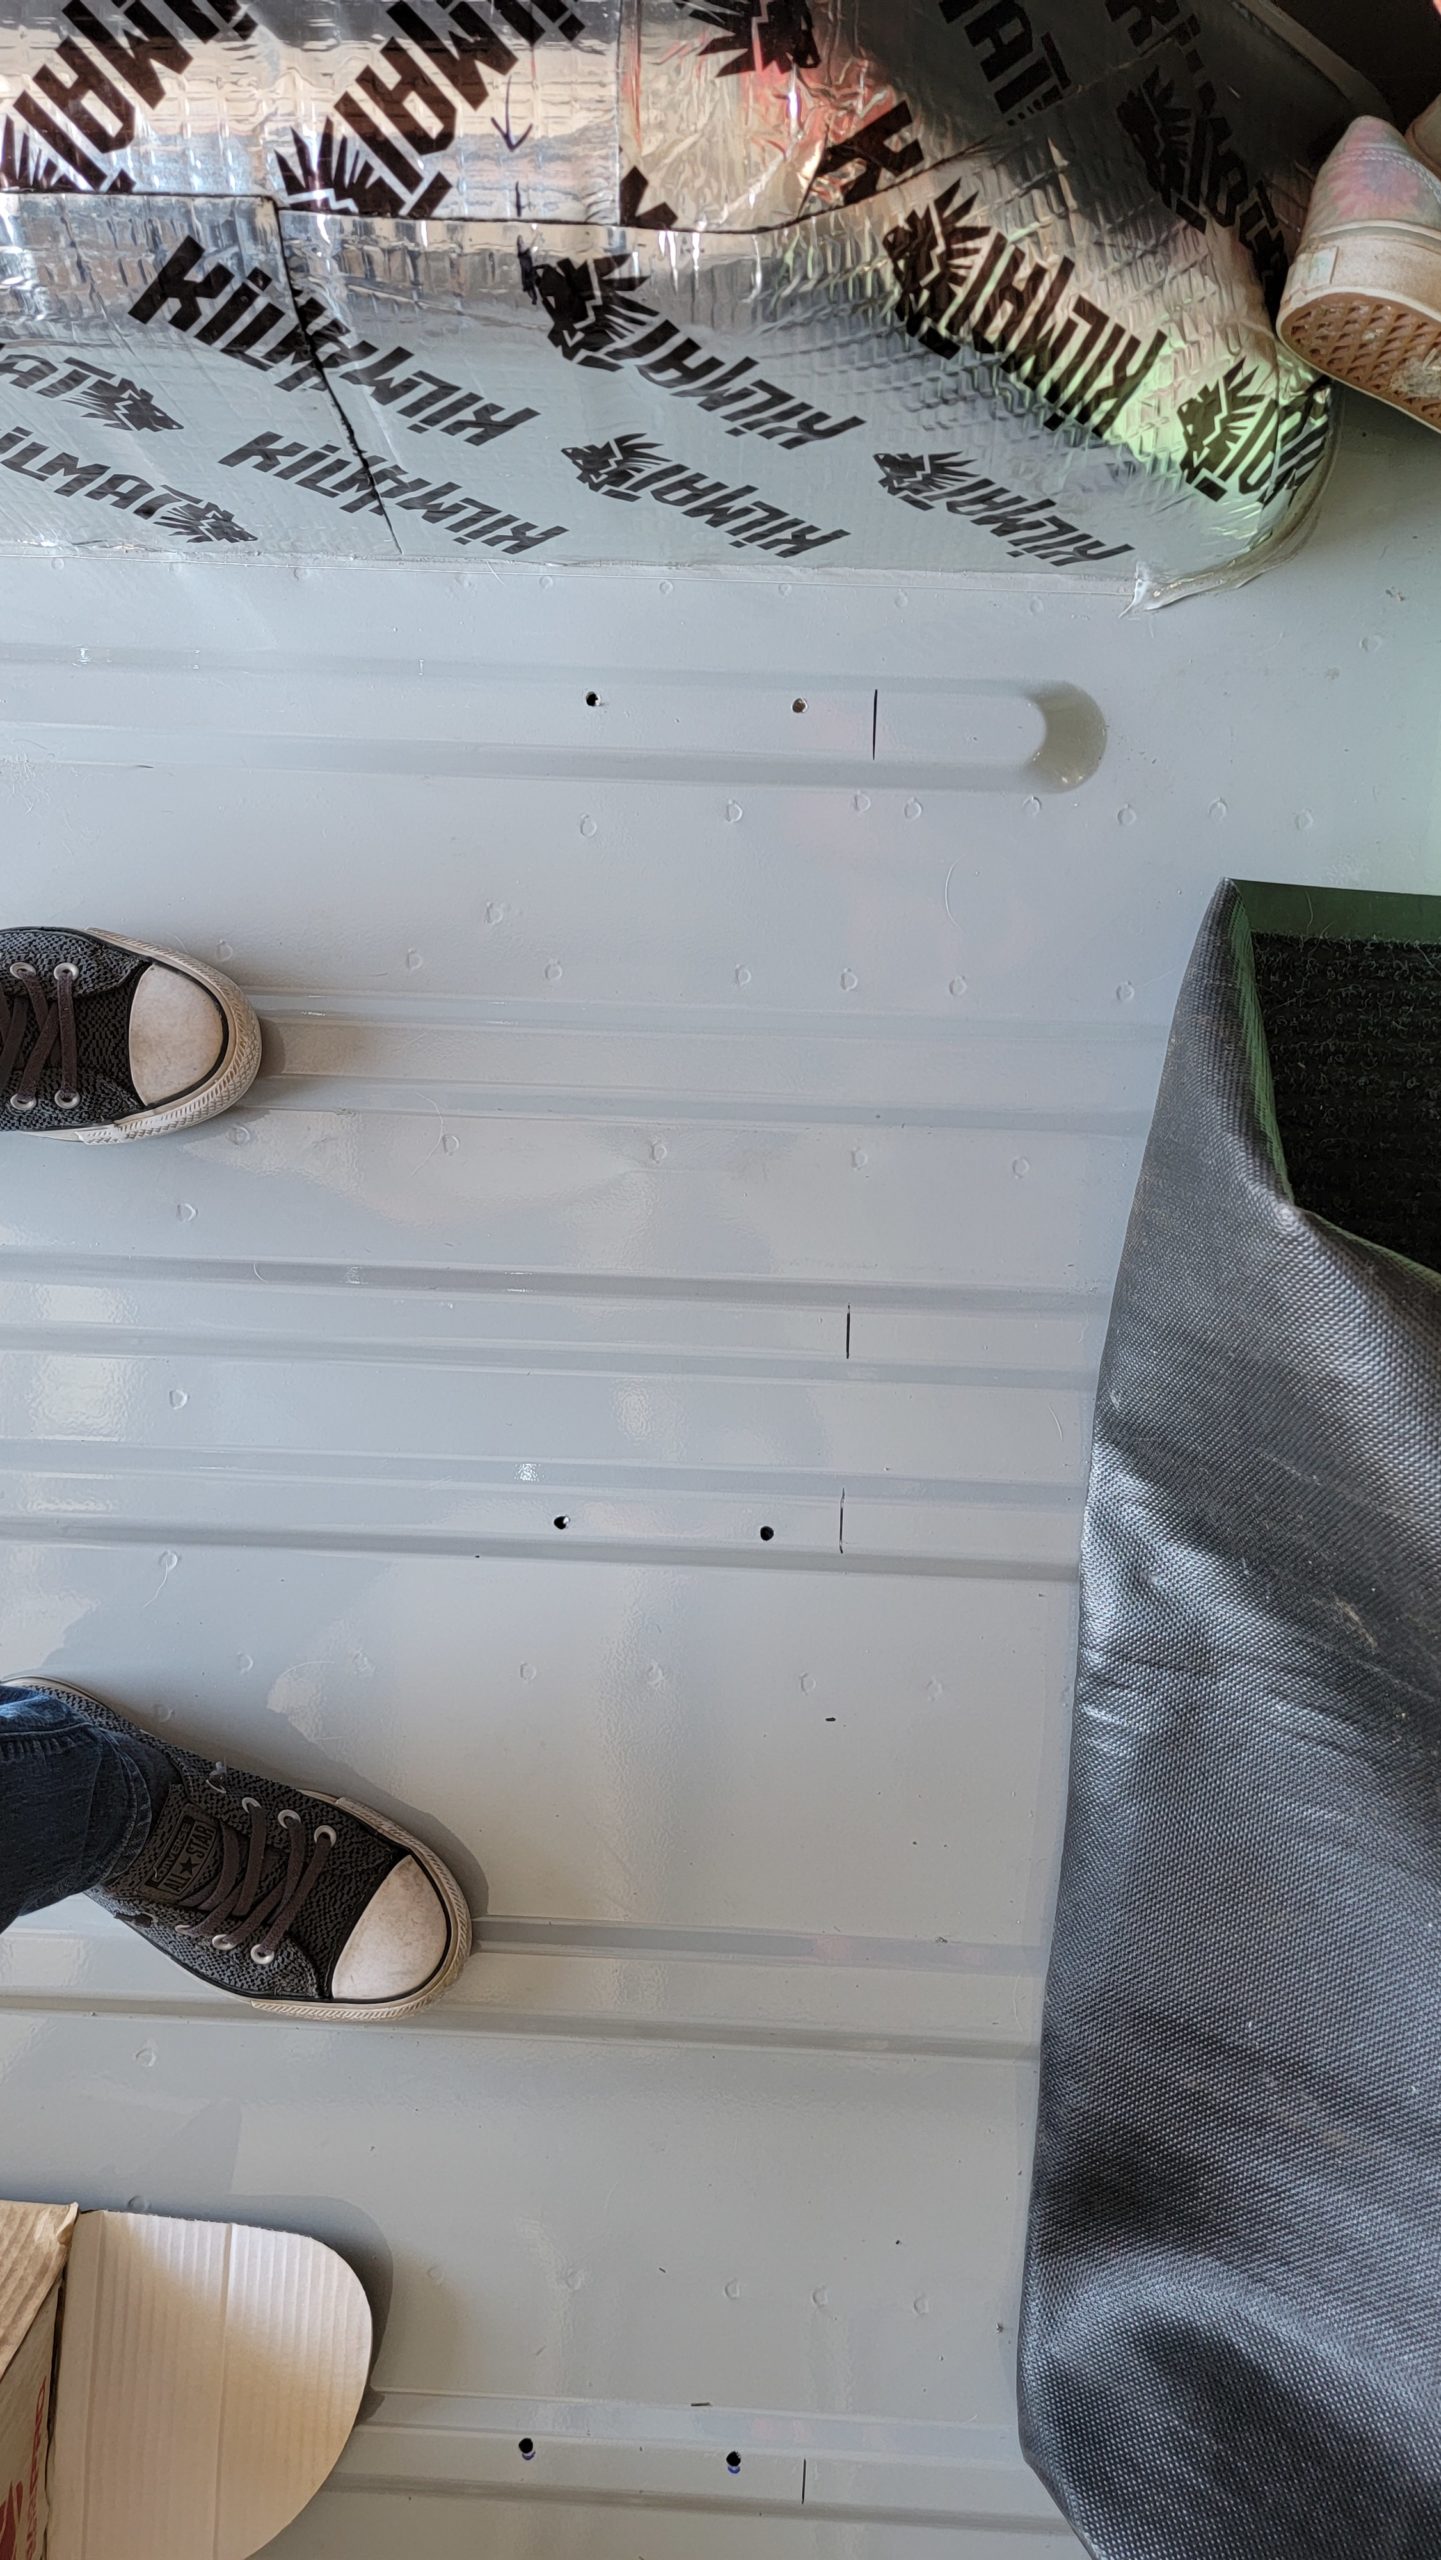
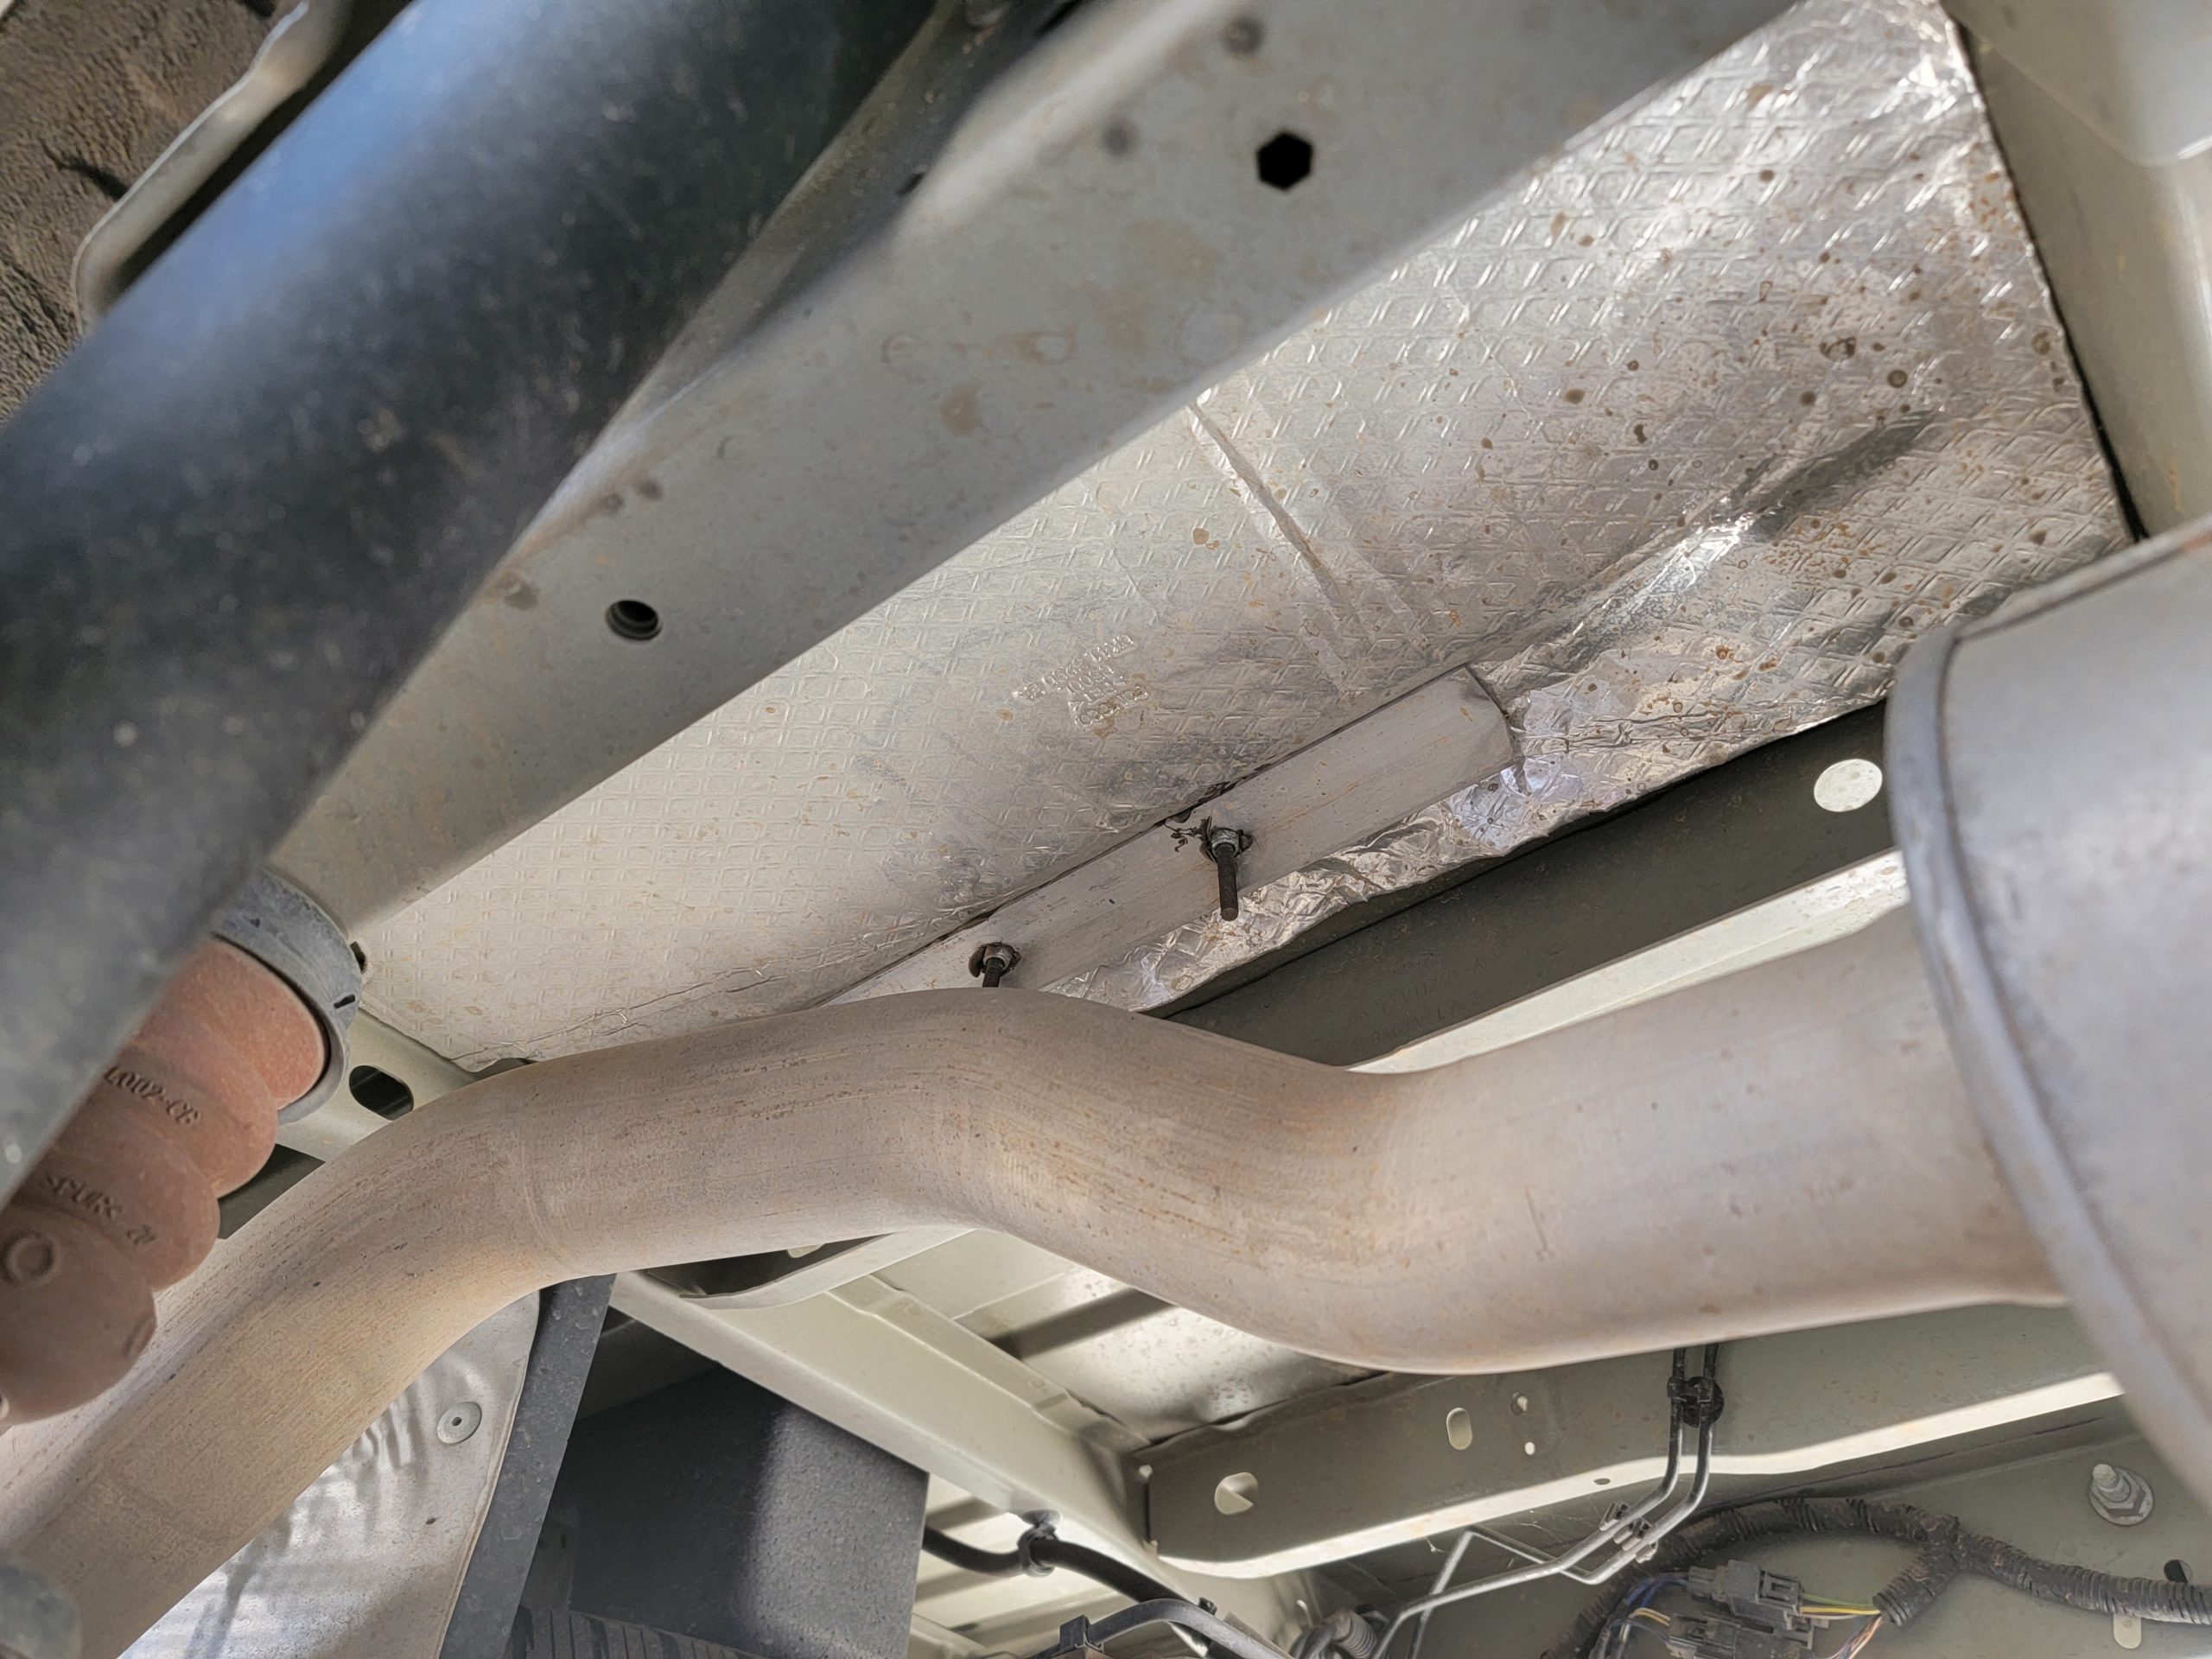
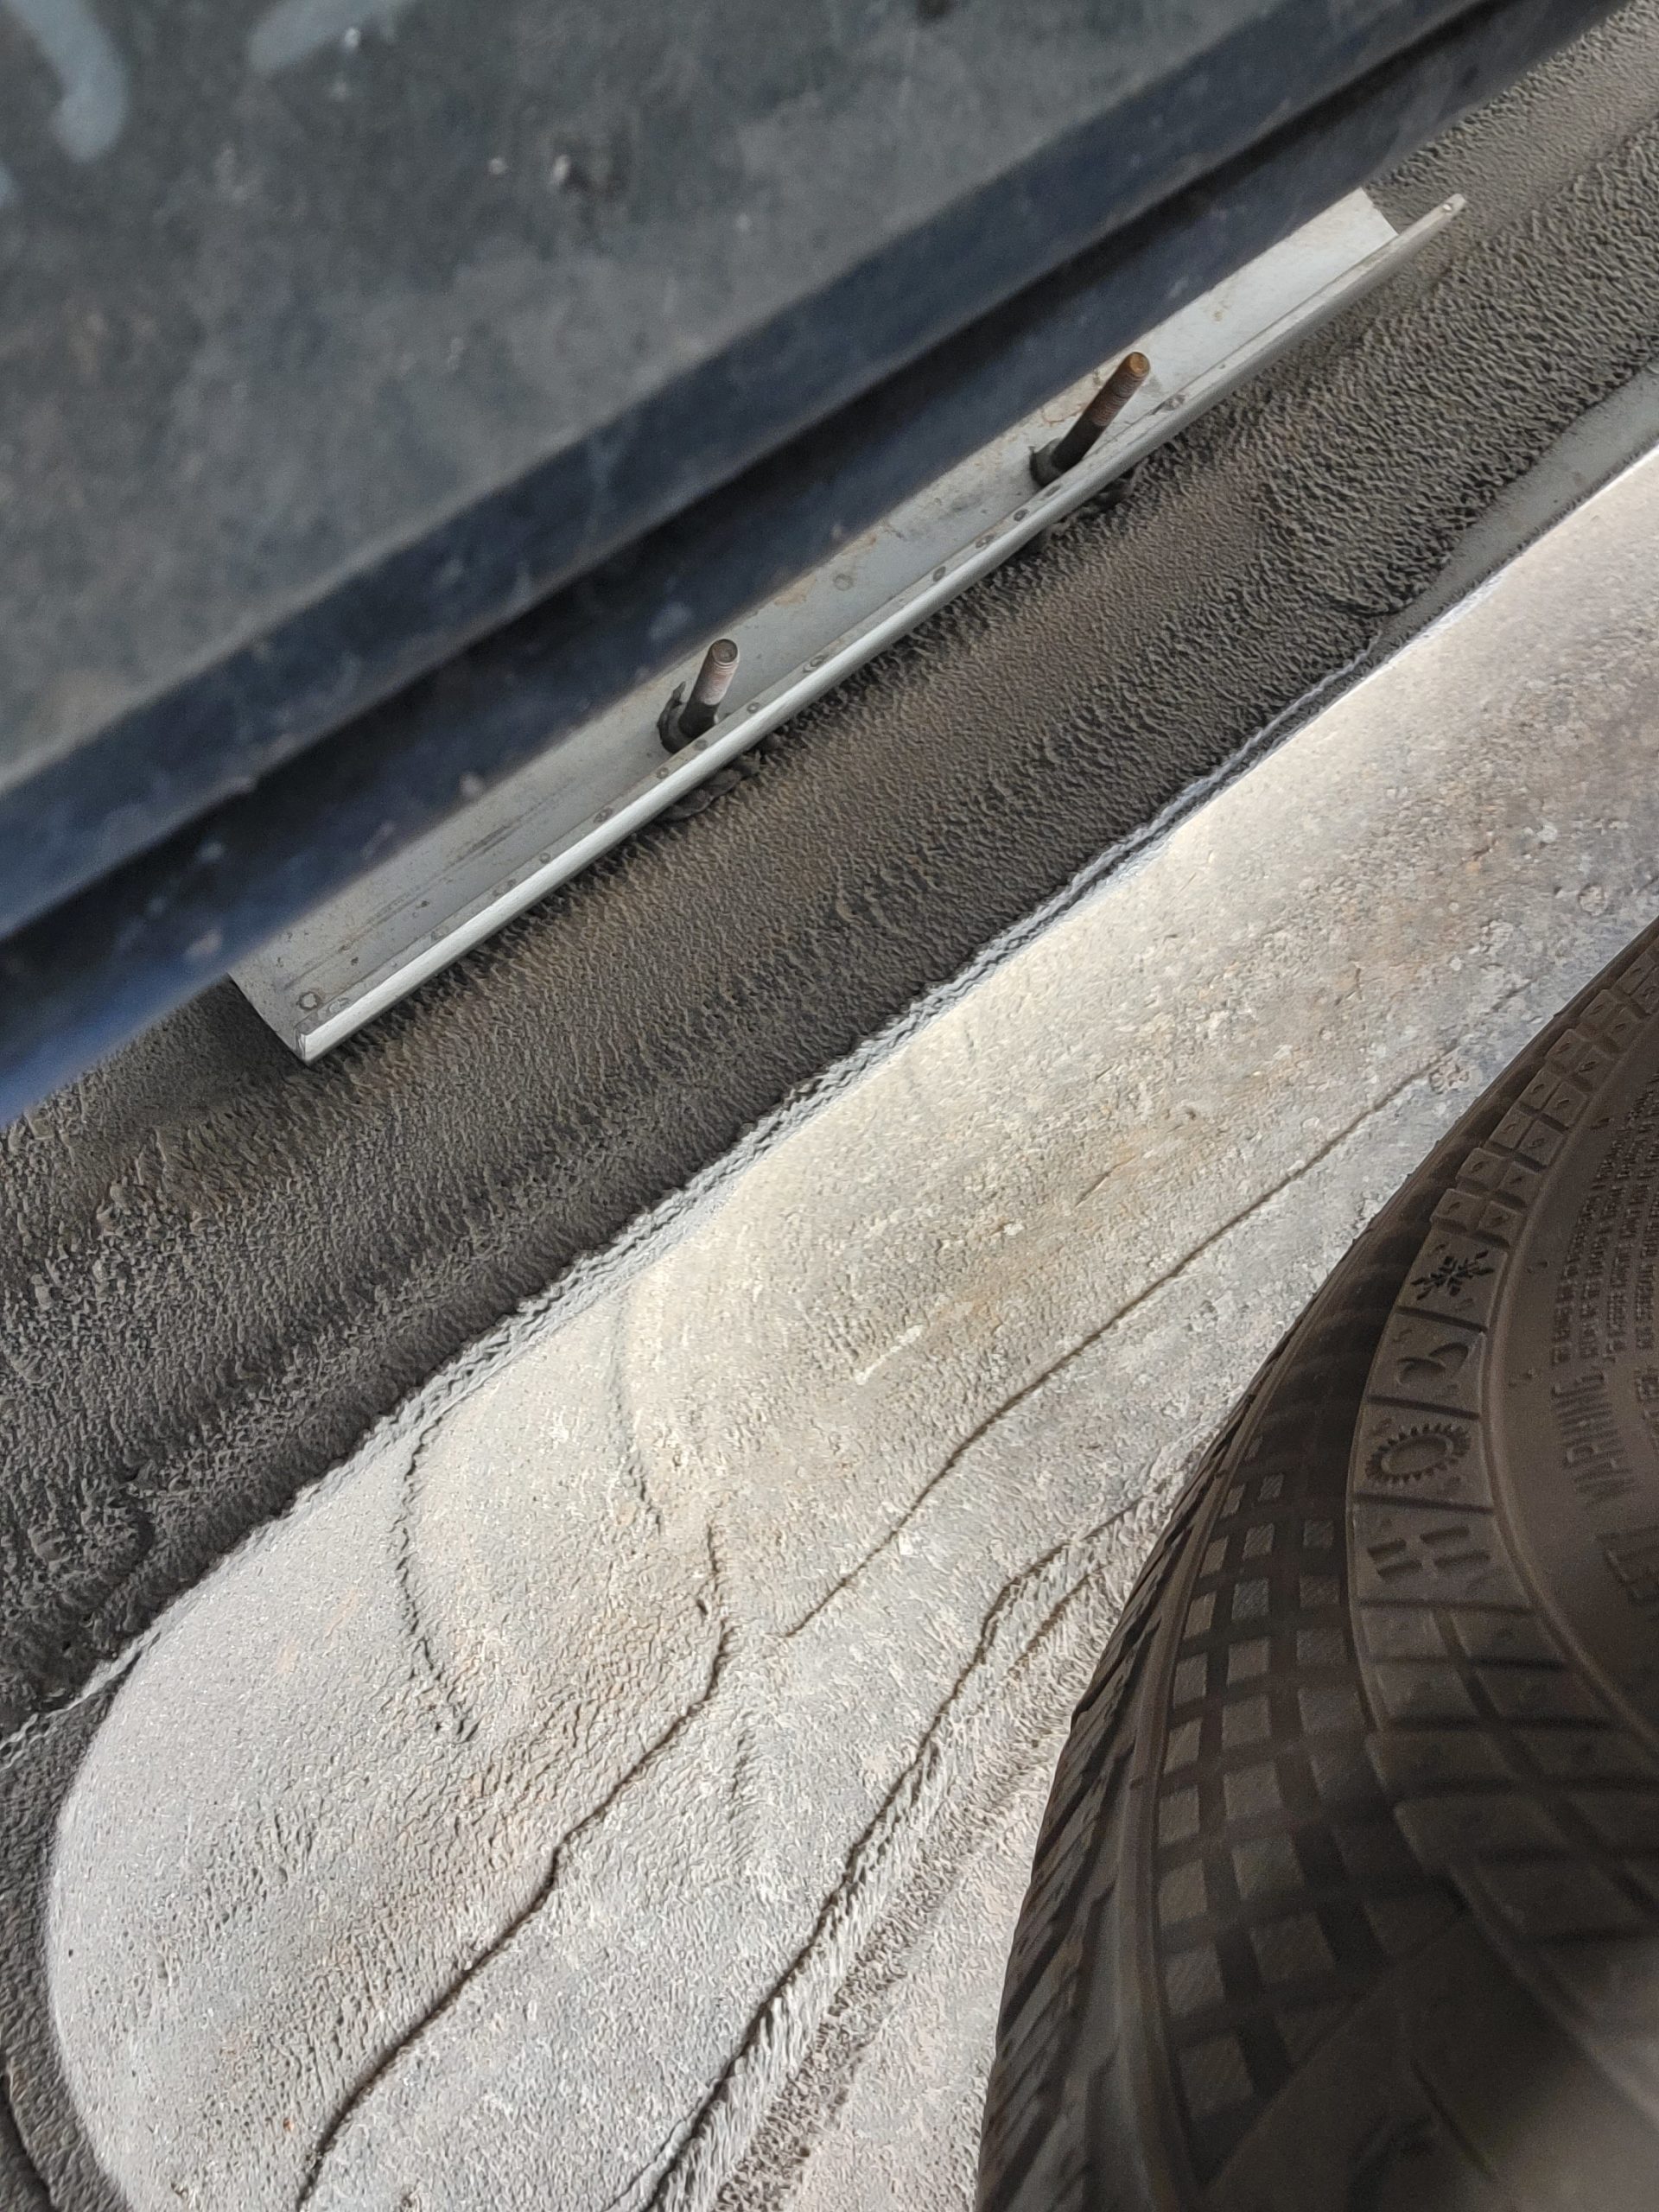
Positioning the moto mounts
After loading the bikes to determine space optimizing positions the mounts were attached to the van floor. After drilling holes in the floor of the van (check underneath to be sure you don’t hit any other components), the drilled holes were painted. Aluminum angle iron was added to the underside of the van to spread the force of the mounts away from the mounting bolts. Generous amounts of silicone were used to prevent any water from coming up from under the van.
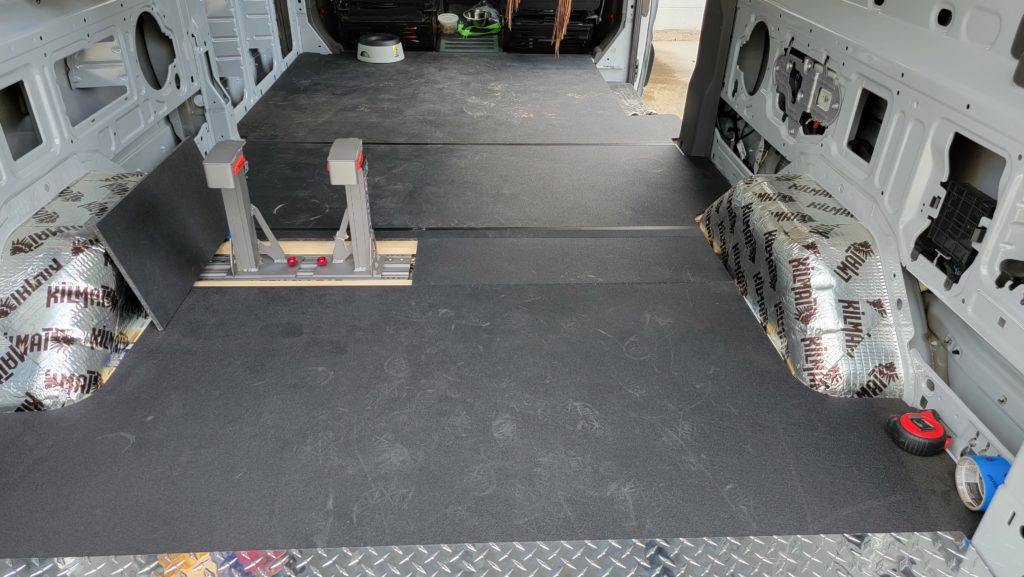
Installing the camper van floor – Struts and Insulation
One of my goals was to have a completely level floor surface when the motorcycles are not loaded. I wanted the Risk Racing mounts to be hidden under the actual camper van floor.
The next step was to mount struts across the high points of the floor so that a solid floor could be installed that covered the motorcycle mounts when not in use.
Soundproofing the camper van floor
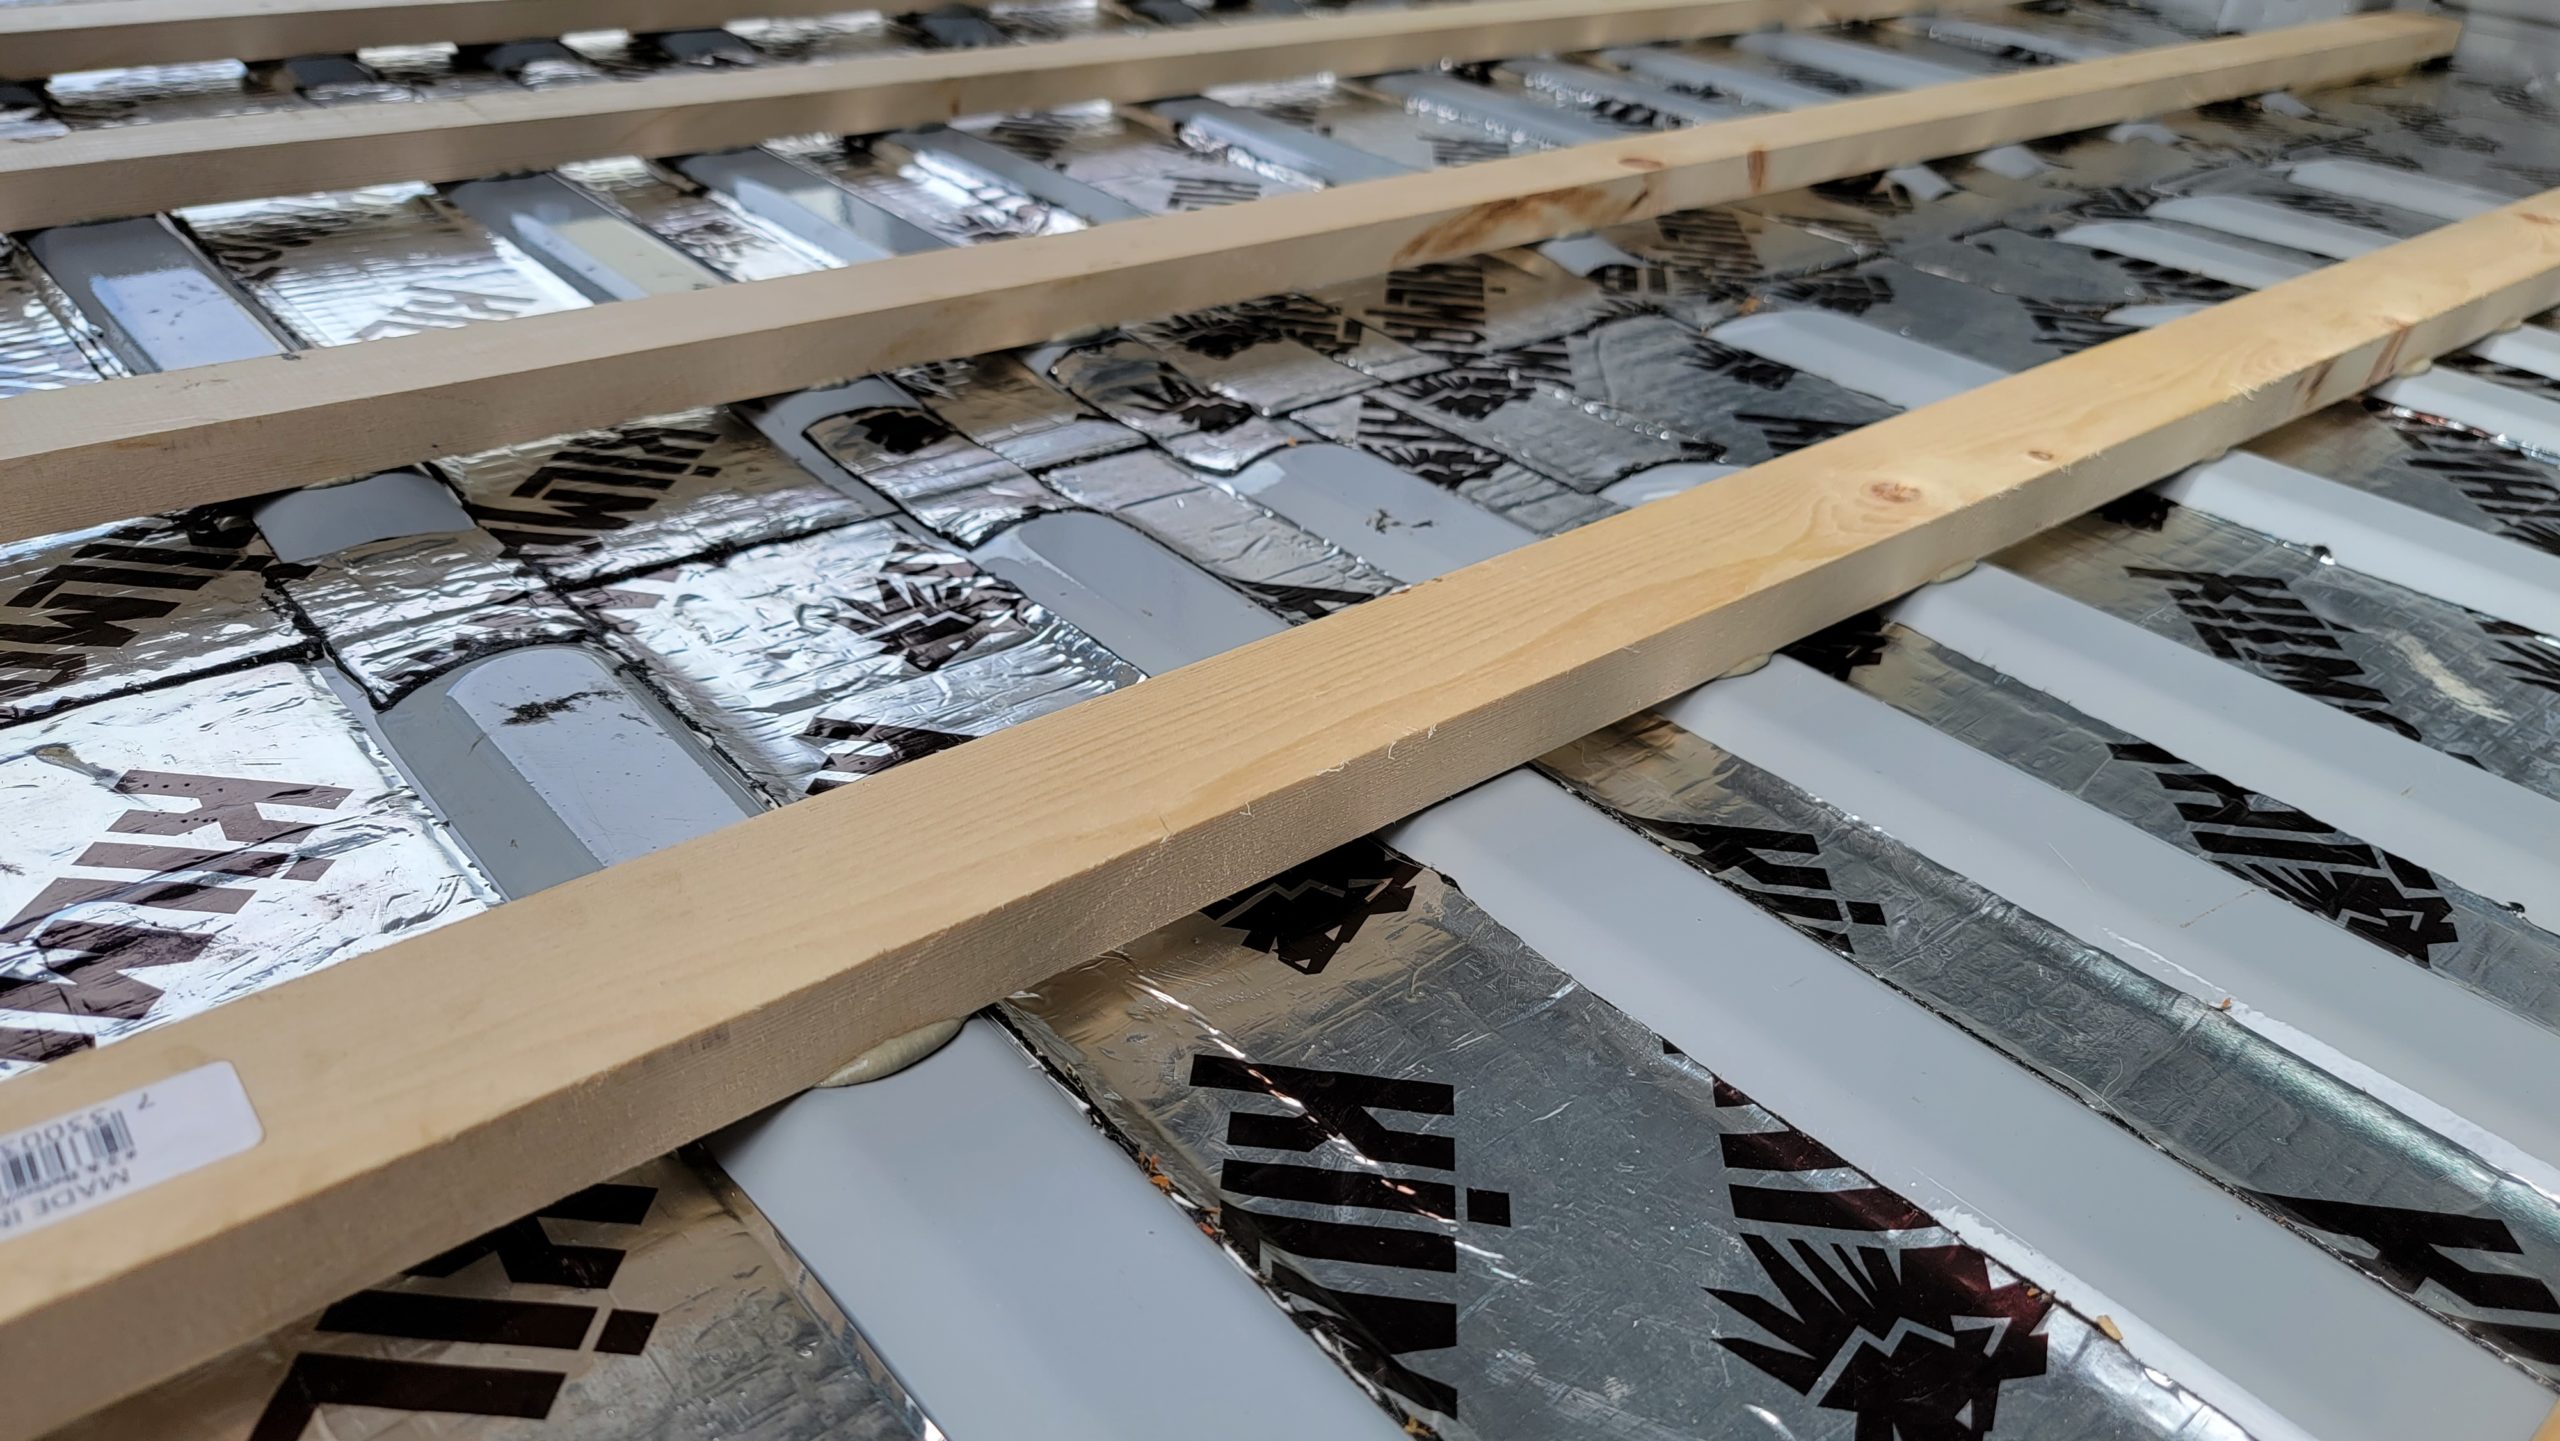
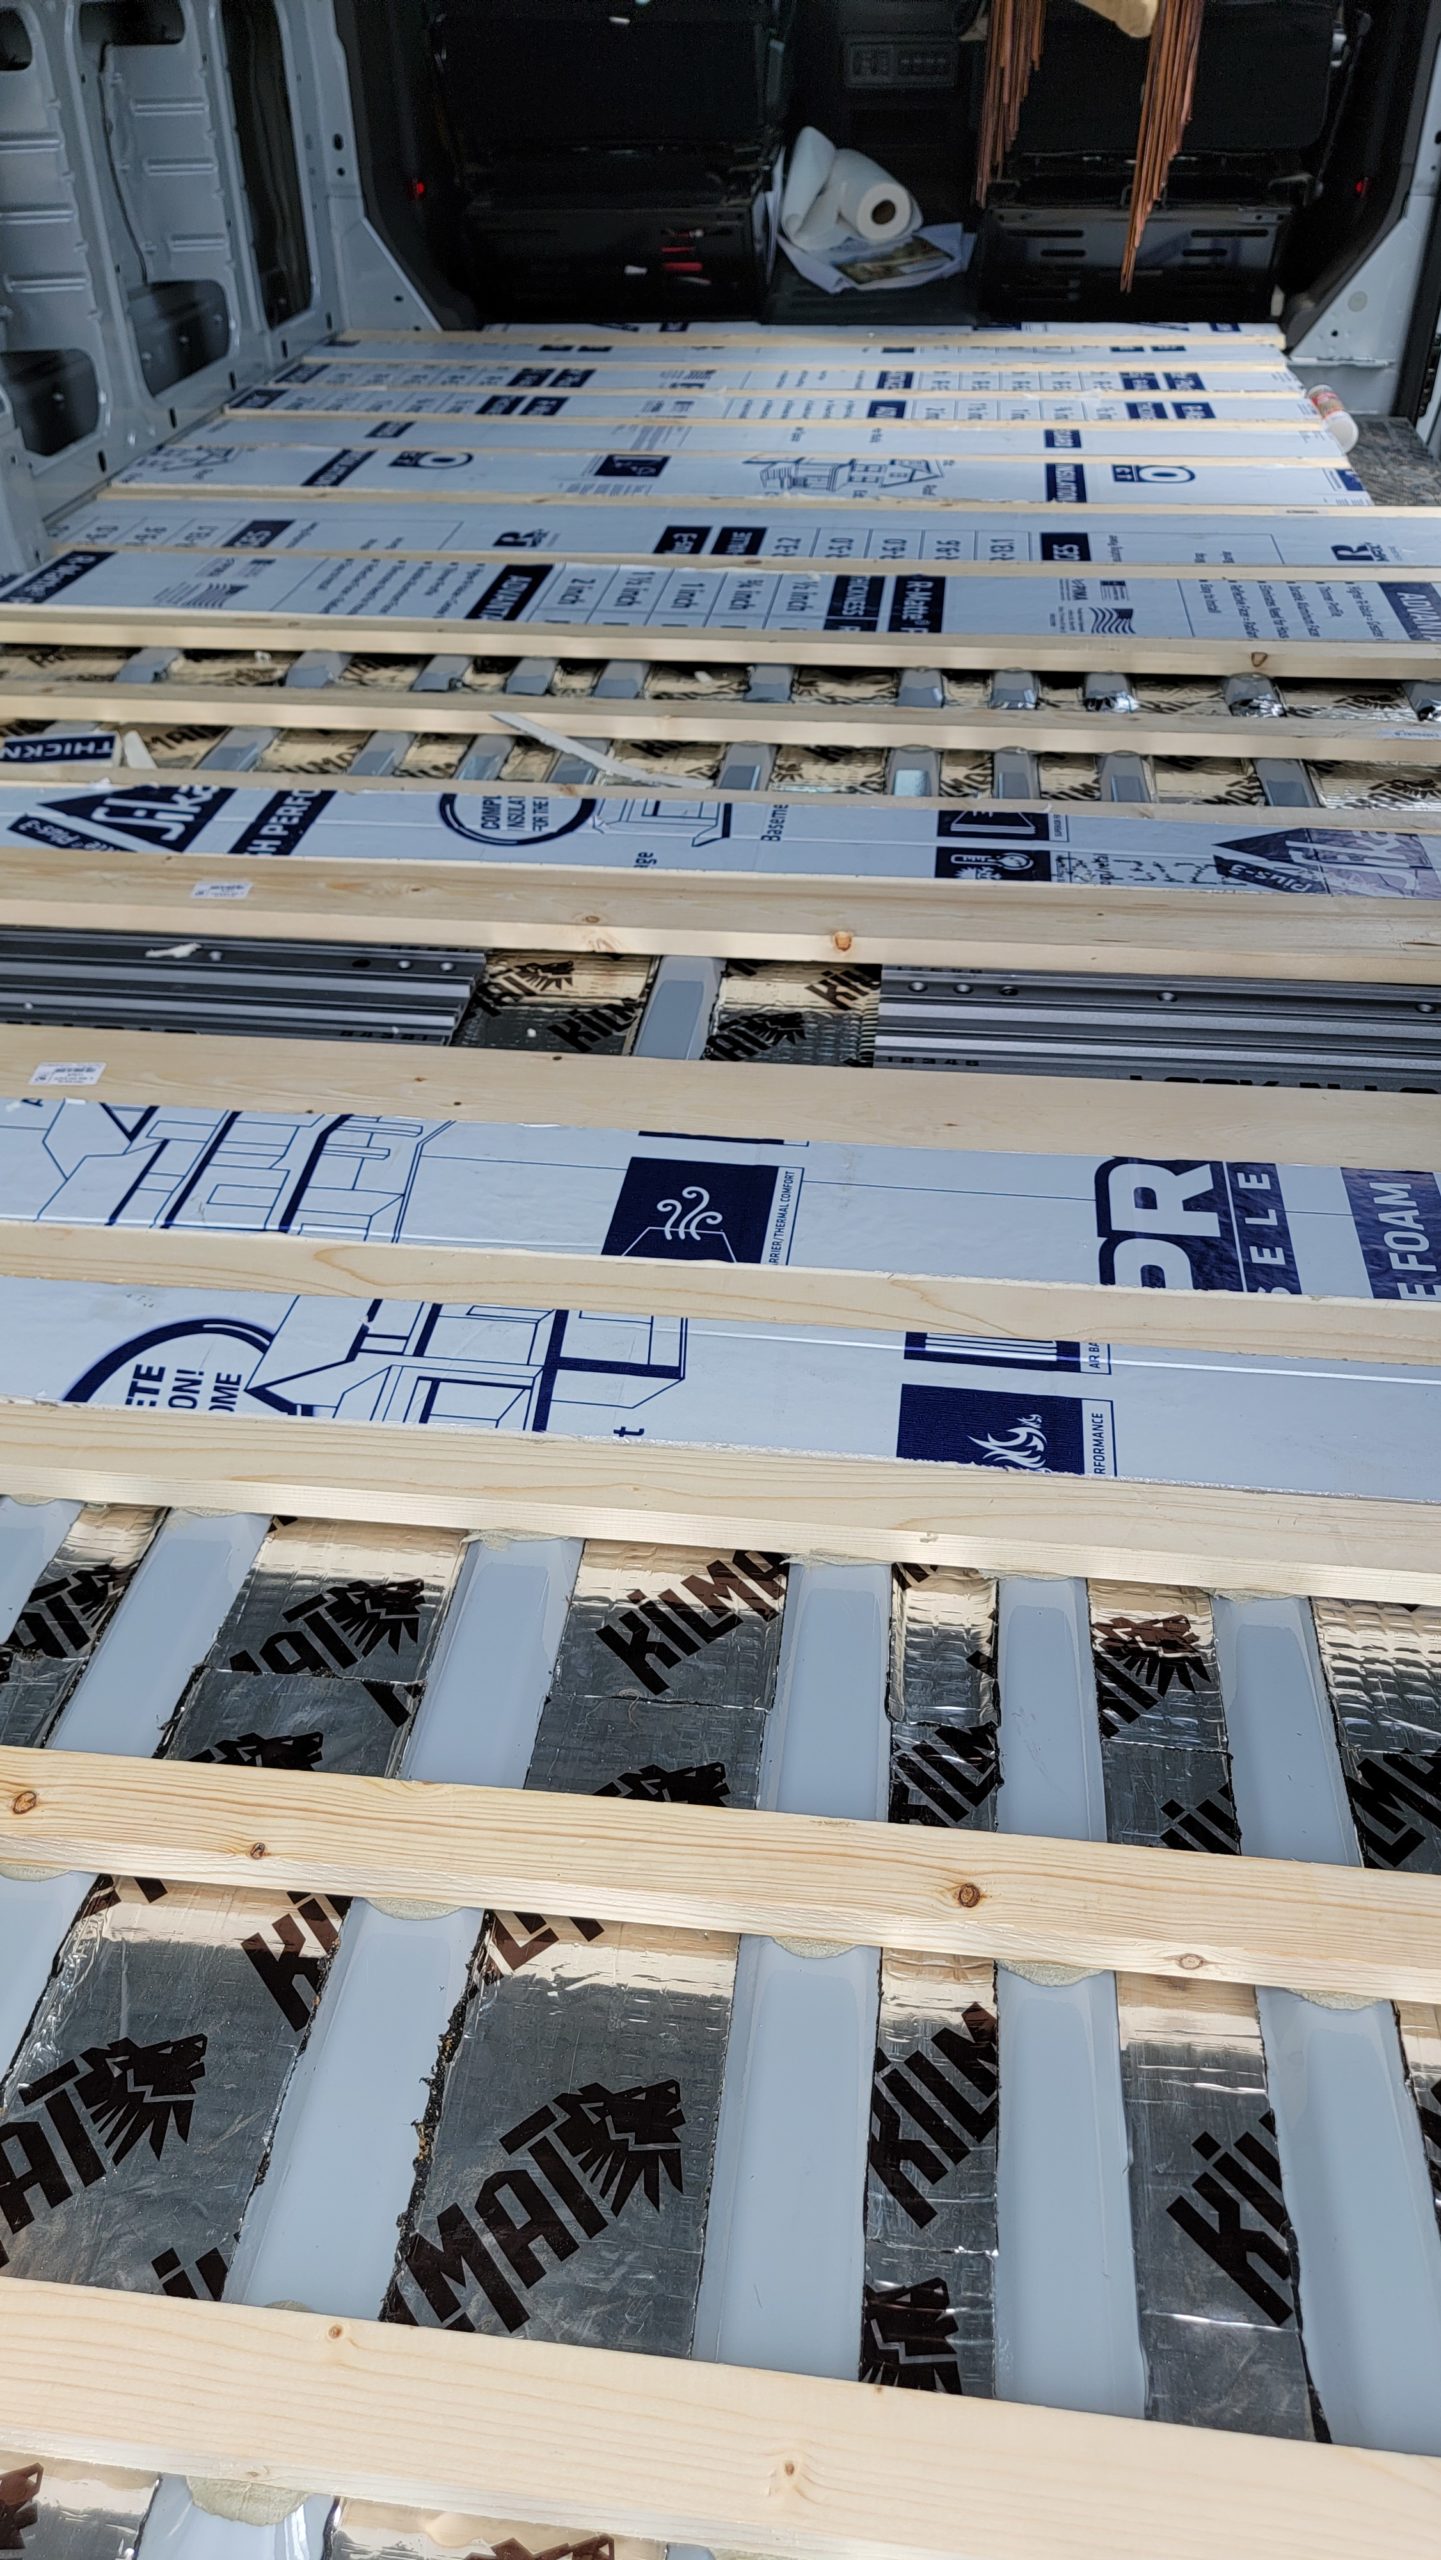
Sound proofing material was cut and adhered to the low valleys in the van floor. This helps a little with insulation, but primarily was used to cut down on road noise. By doing just the valleys it left the hills or high points free and solid to adhere to the struts in the next step.
Moisture control under the camper van floor
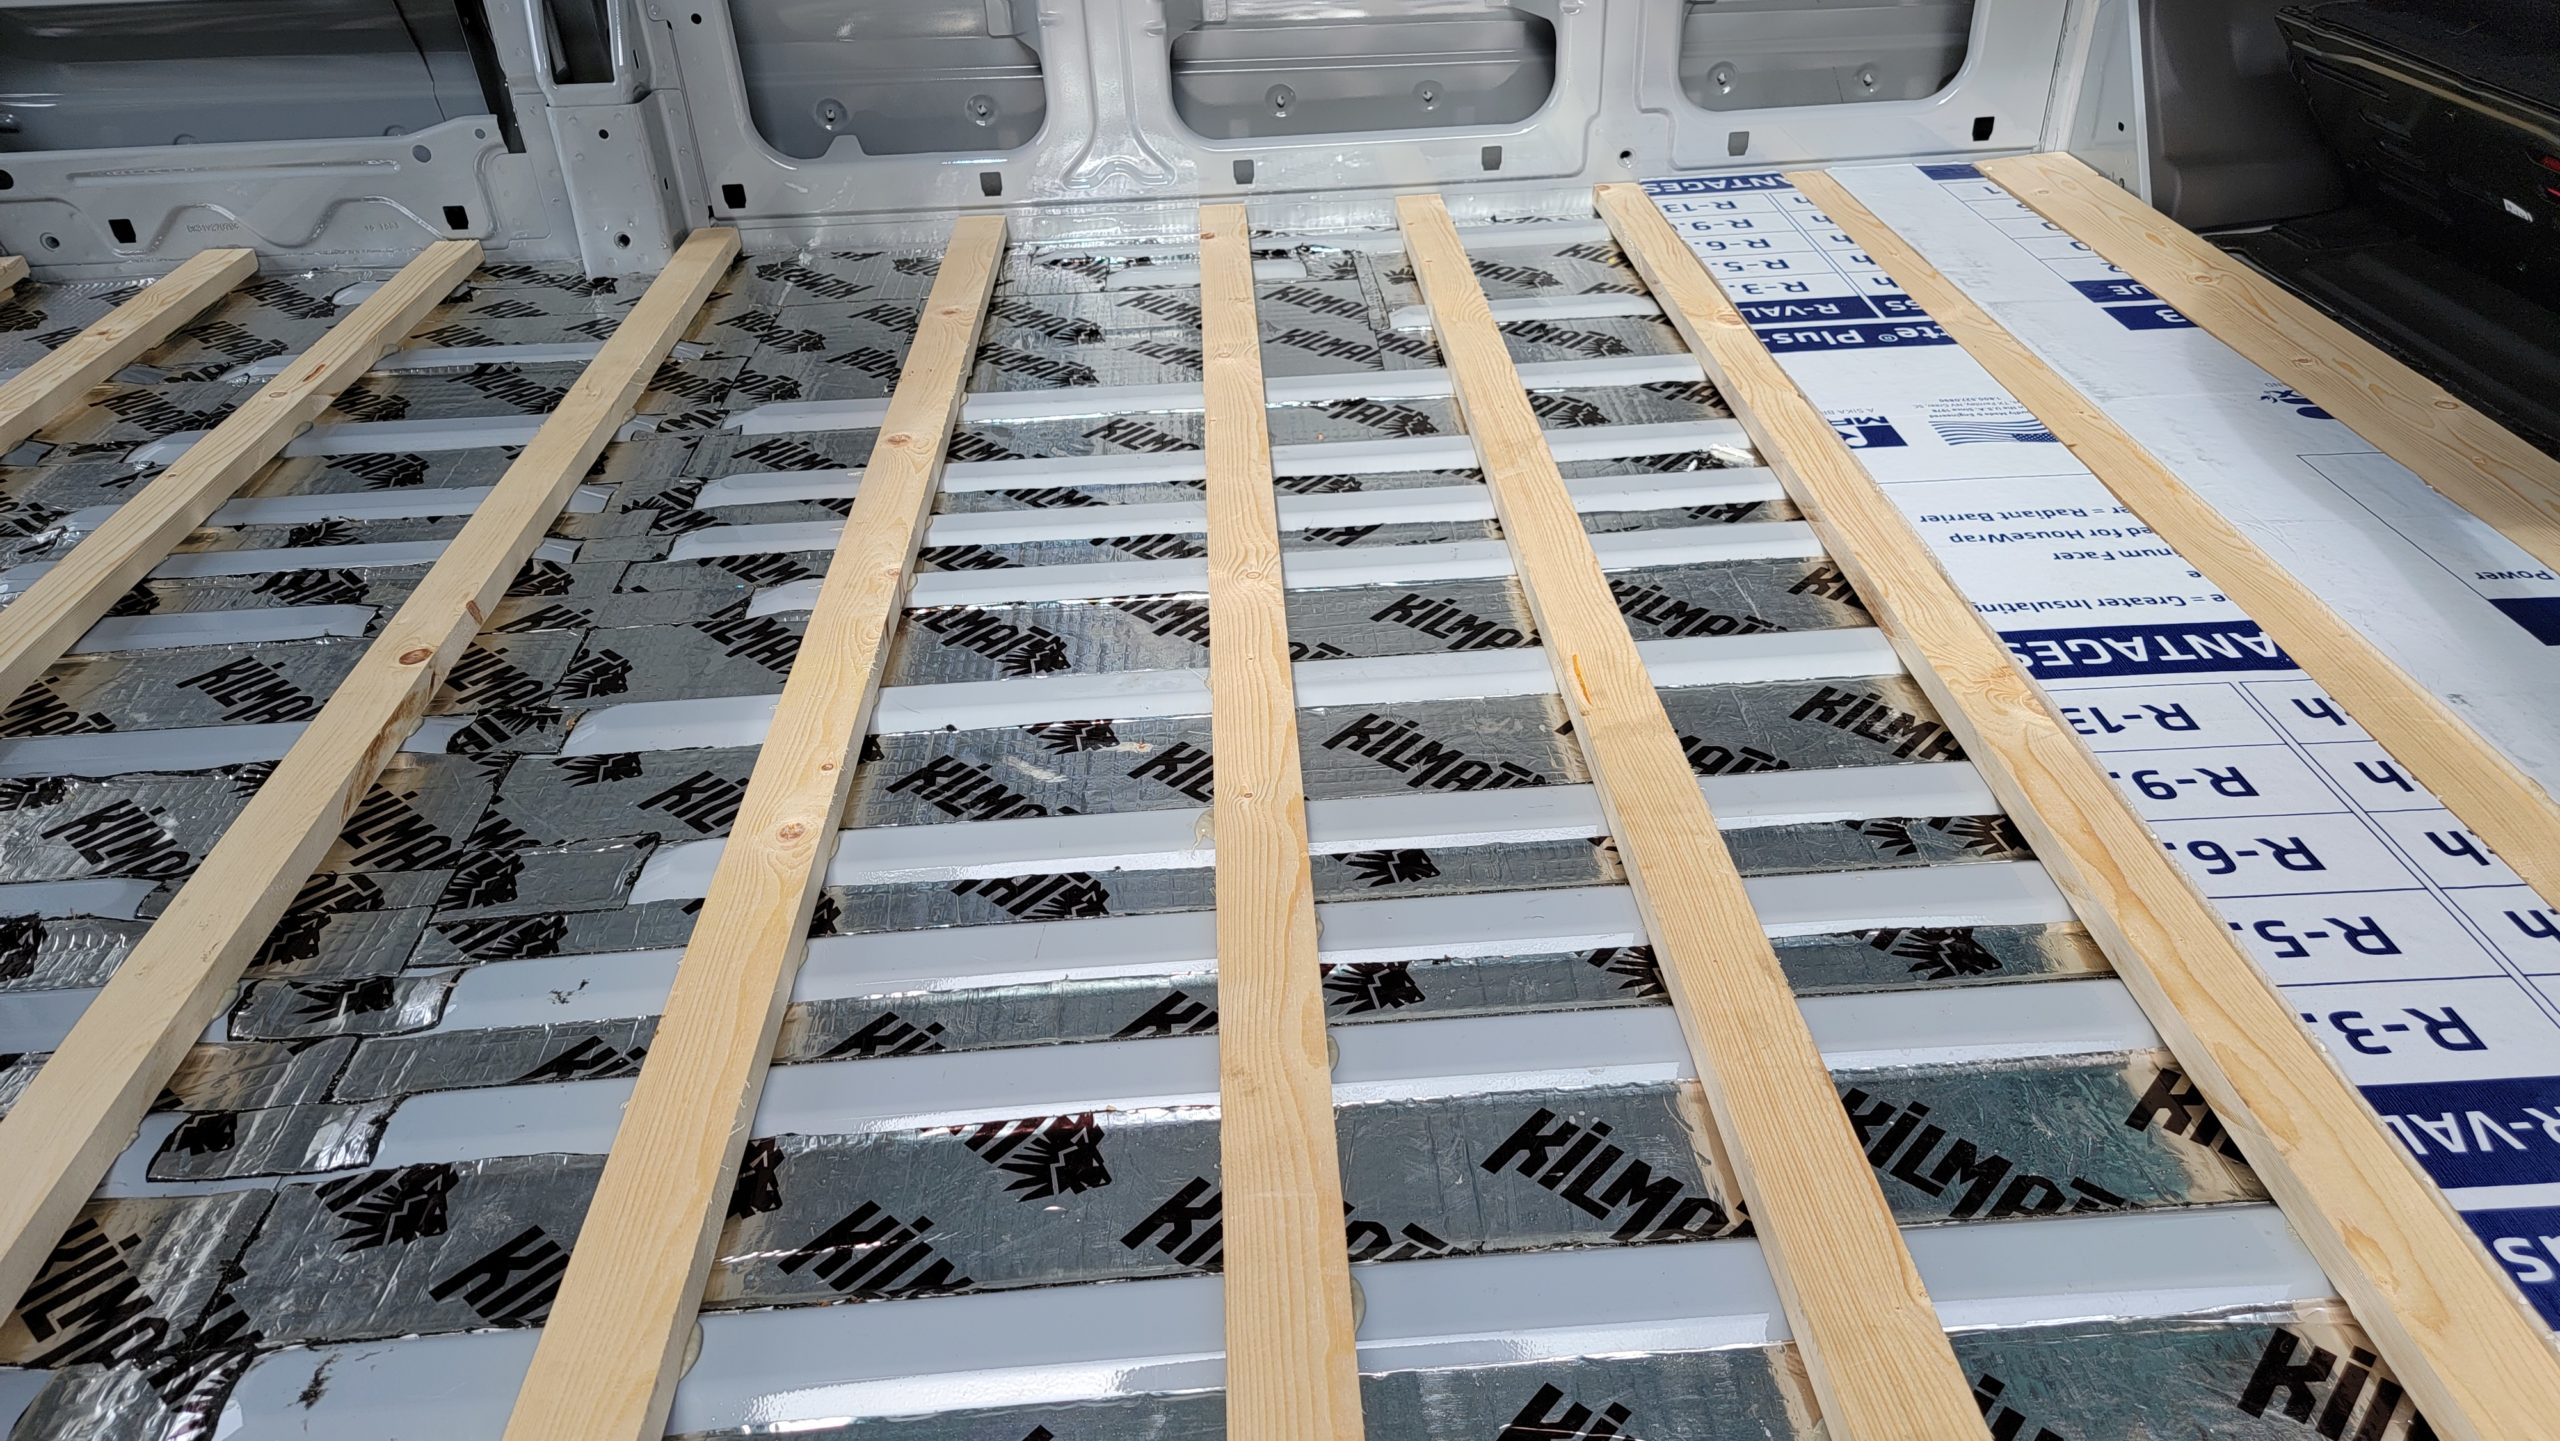
Wooden (wood is a better insulator than metal) 1″ x 3″ strips (actually 3/4 inches thick) were secured by high strength construction adhesive. They were “glued down” to the high points of the camper van floor. This allows for air flow underneath the insulation, struts and flooring (even with the sound proofing in the valleys there is still air flow) so that any condensation from temperature changes can dry on its own. (You do not want this to be completely sealed, while that would be good for insulation the metal floor will sweat and cause moisture problems).
Get ready to glue
It helped to precut the wood struts and do a trial placement throughout the van prior to gluing them down. Once you start with the caulk gun it is a good idea to move quickly and use up each tube of adhesive in one process.
Each contact point on the van floor was cleaned and wiped with rubbing alcohol prior to placing a dab of adhesive. The distance between struts will depend on the type of flooring you plan to install. I was using Stabiligrip, a composite material, and was concerned about flex if the space was too big. Thus my struts are only about 5 inches apart. The distance between struts so that the number of contact points were maximized as the hills (high points) of the van floor fluctuate.
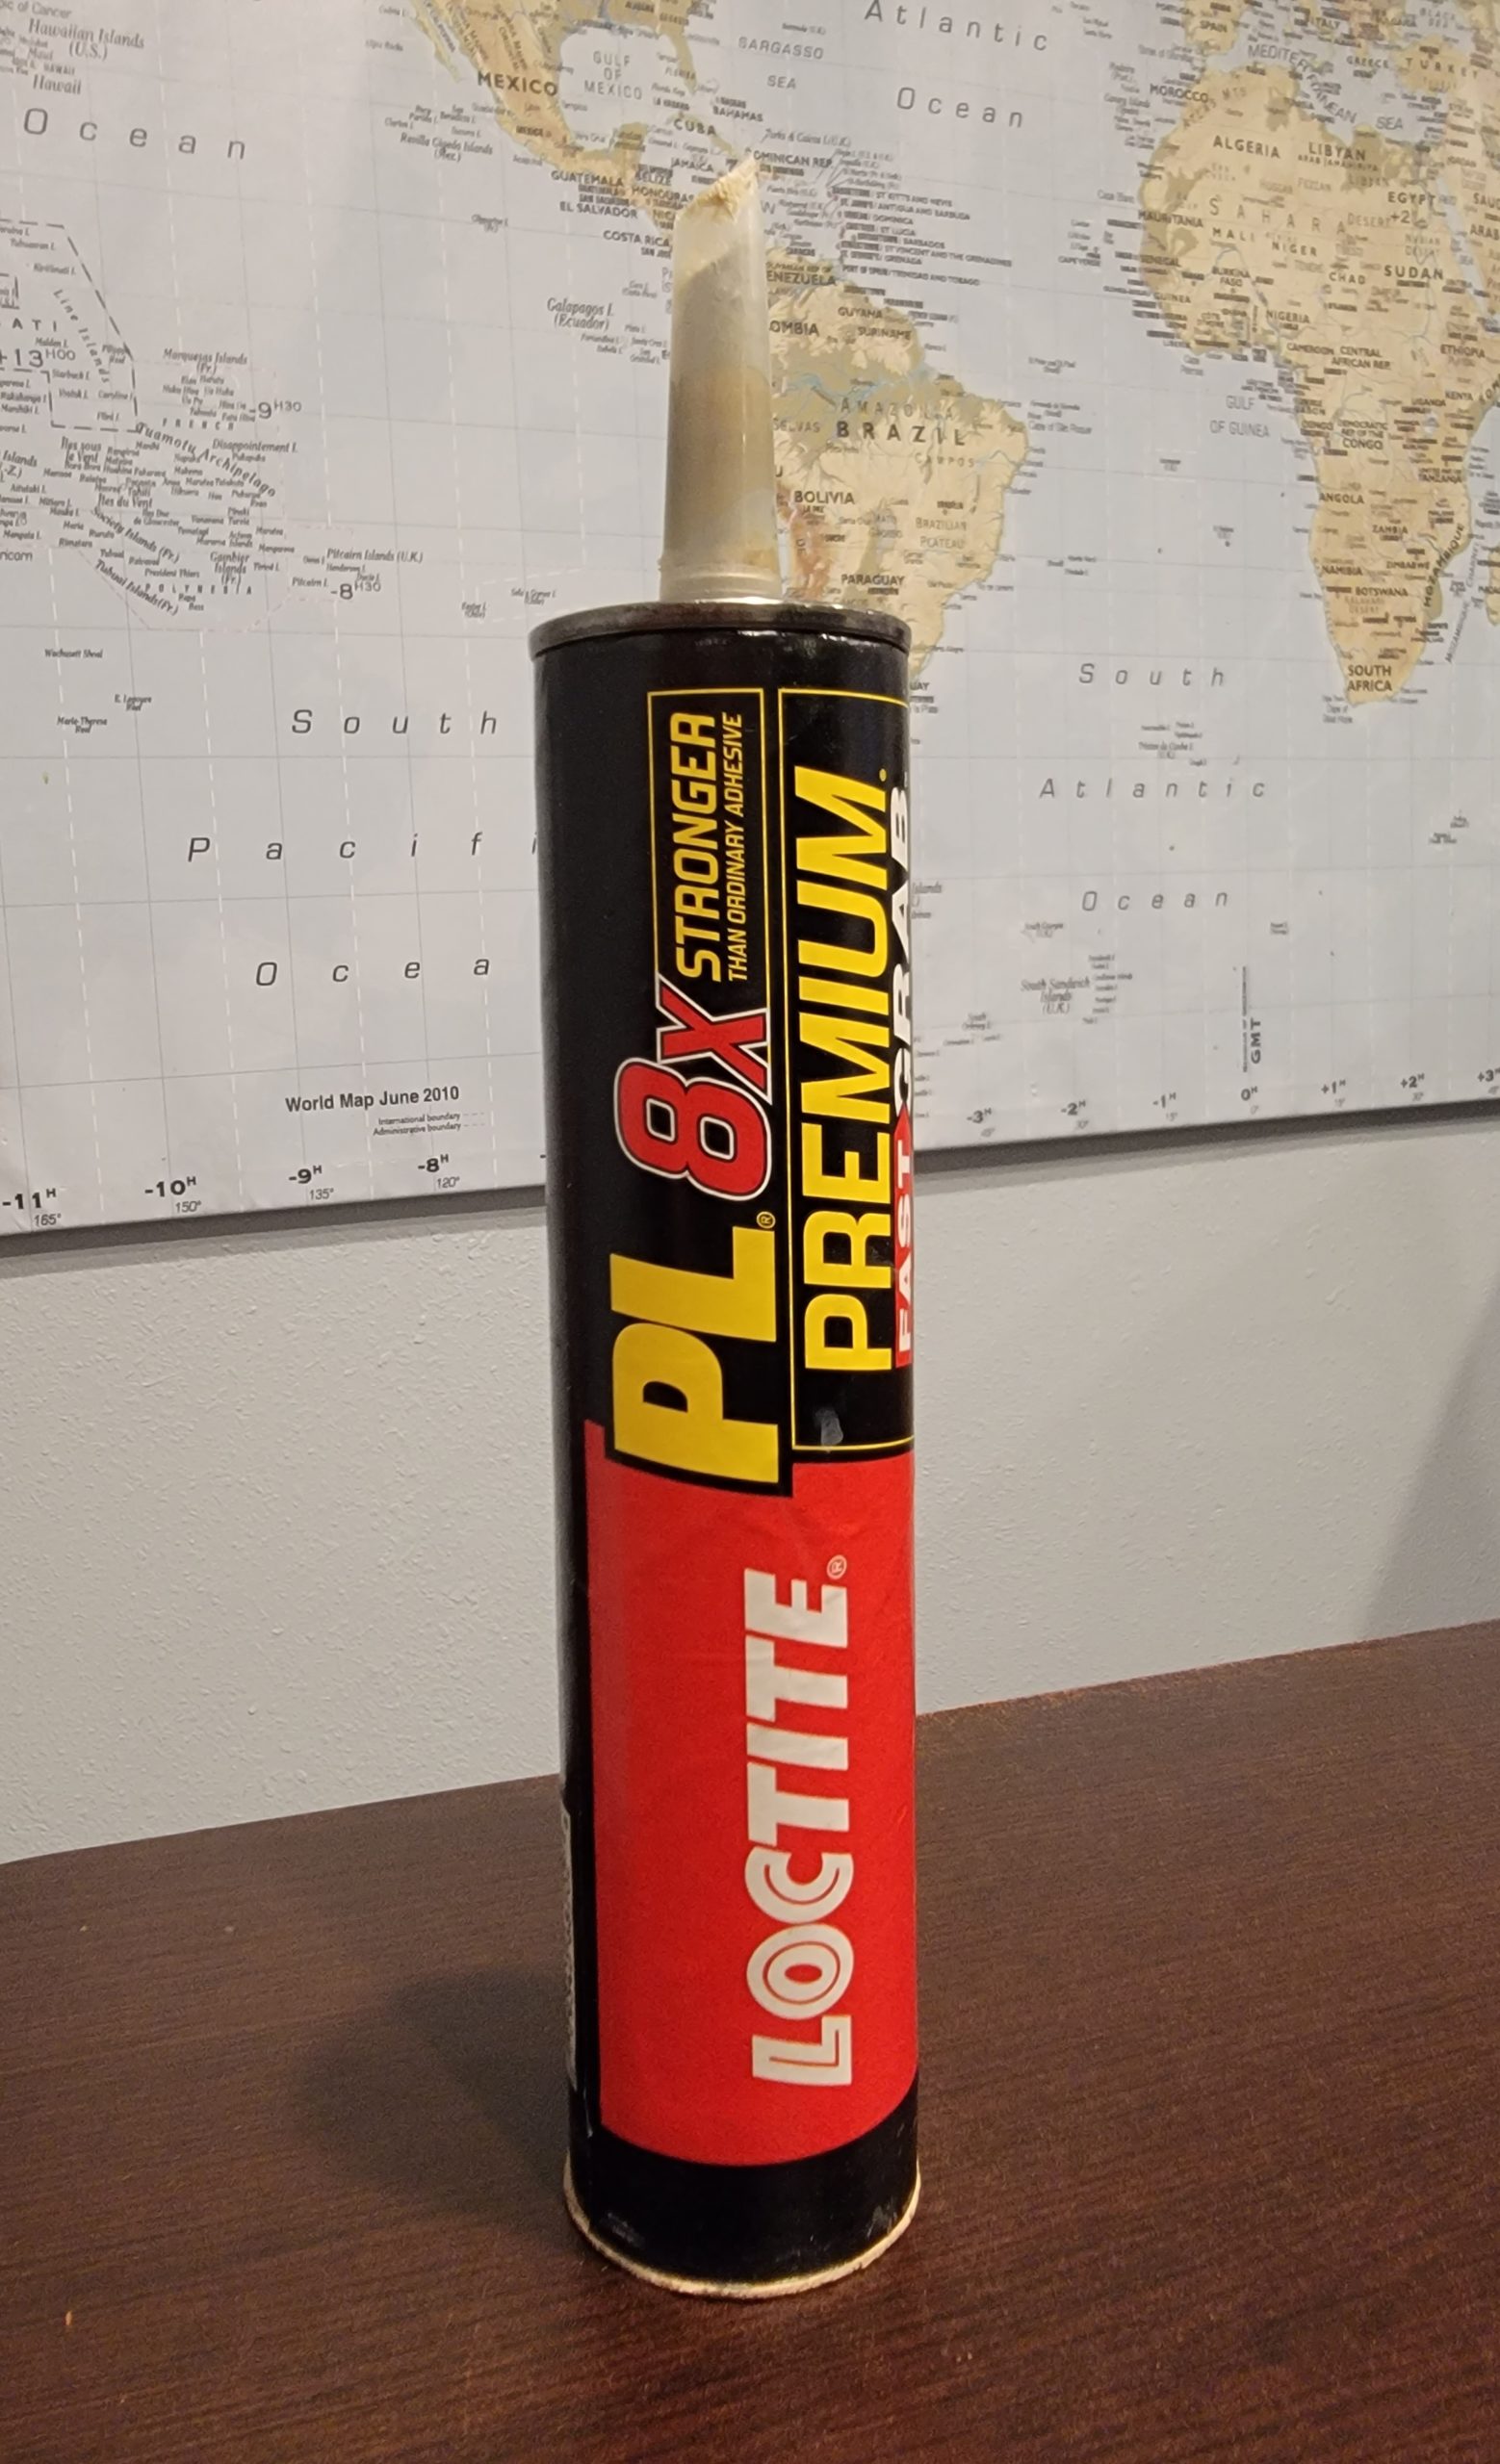
Loctite PL 8x Fast Grab is difficult to find, but worth the effort. Try Ace Hardware.
I had toyed with a way to position these struts in a more temporary manner so that they could be removed later and decided that the unlikely possibility of needing to remove them was not worth having to penetrate the van floor to secure them – thus the adhesive.
Note: If you are installing the Lock and Load mounts use a wider strut or position two together on each side of the mounts. You will want to support the permanent flooring on each side of the mounts and also have support for the removable floor panels that allow you access to the mounts.
Solid sheet insulation for the camper van floor
Using solid sheet insulation allowed me to maintain the air gap in the valleys for ventilation and made the most sense for this install. After the adhesive holding the wood struts in place dried 3/4 inch foam board was cut to fit.
It worked well to have the sheet insulation match the thickness of the struts as the insulation added support to the soon to be installed flooring. The insulation is not glued down.
The Final Strut for the Camper Van Floor
The narrow struts worked great as support for the flooring, however the very back of the van needed more attention. Partially because it back edge is curved and also because it will have motorcycles loaded over it.
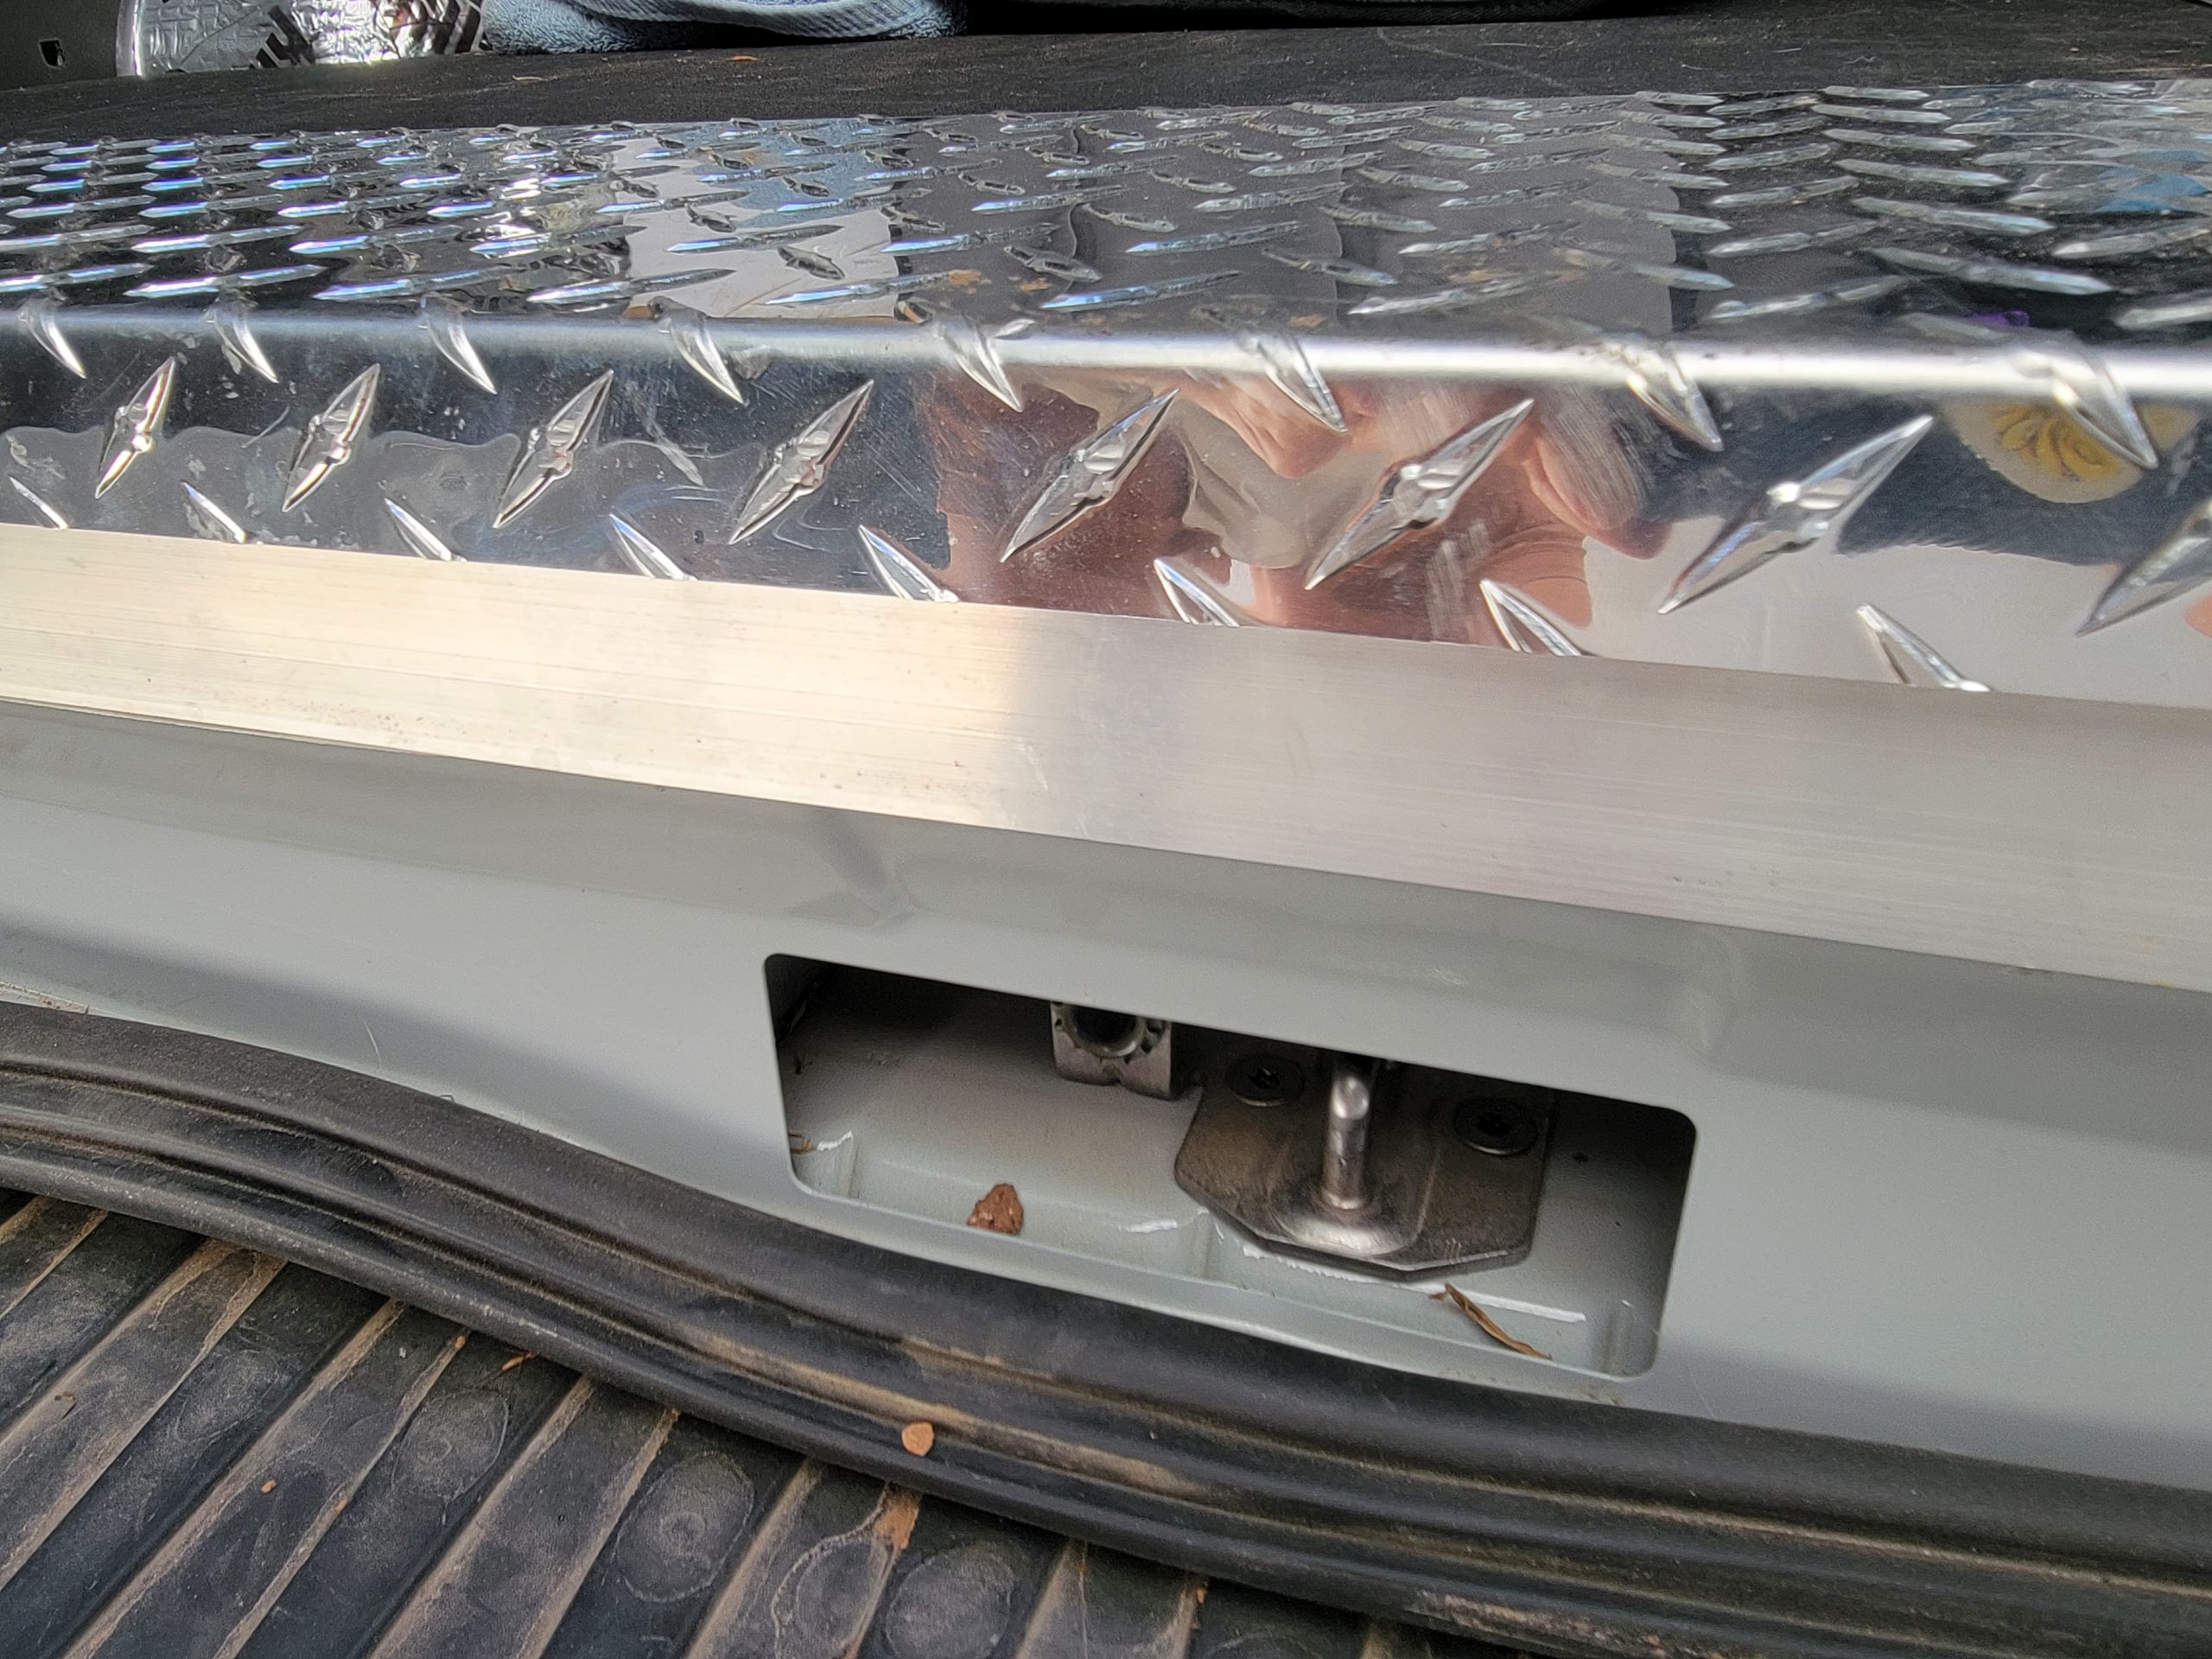
I was not comfortable gluing the final piece at the back of the van down. Access to the mechanism that allows you to lower the spare tire is located there as well as an access point for the left door latch.
Drilling small holes, painting the exposed metal and installing rivnuts on 4 of the “hills” of the van floor worked perfectly.
A 1 x 12 board was cut to emulate the curve at the rear of the van. A hole saw was used to cut an access hole for the spare tire release.

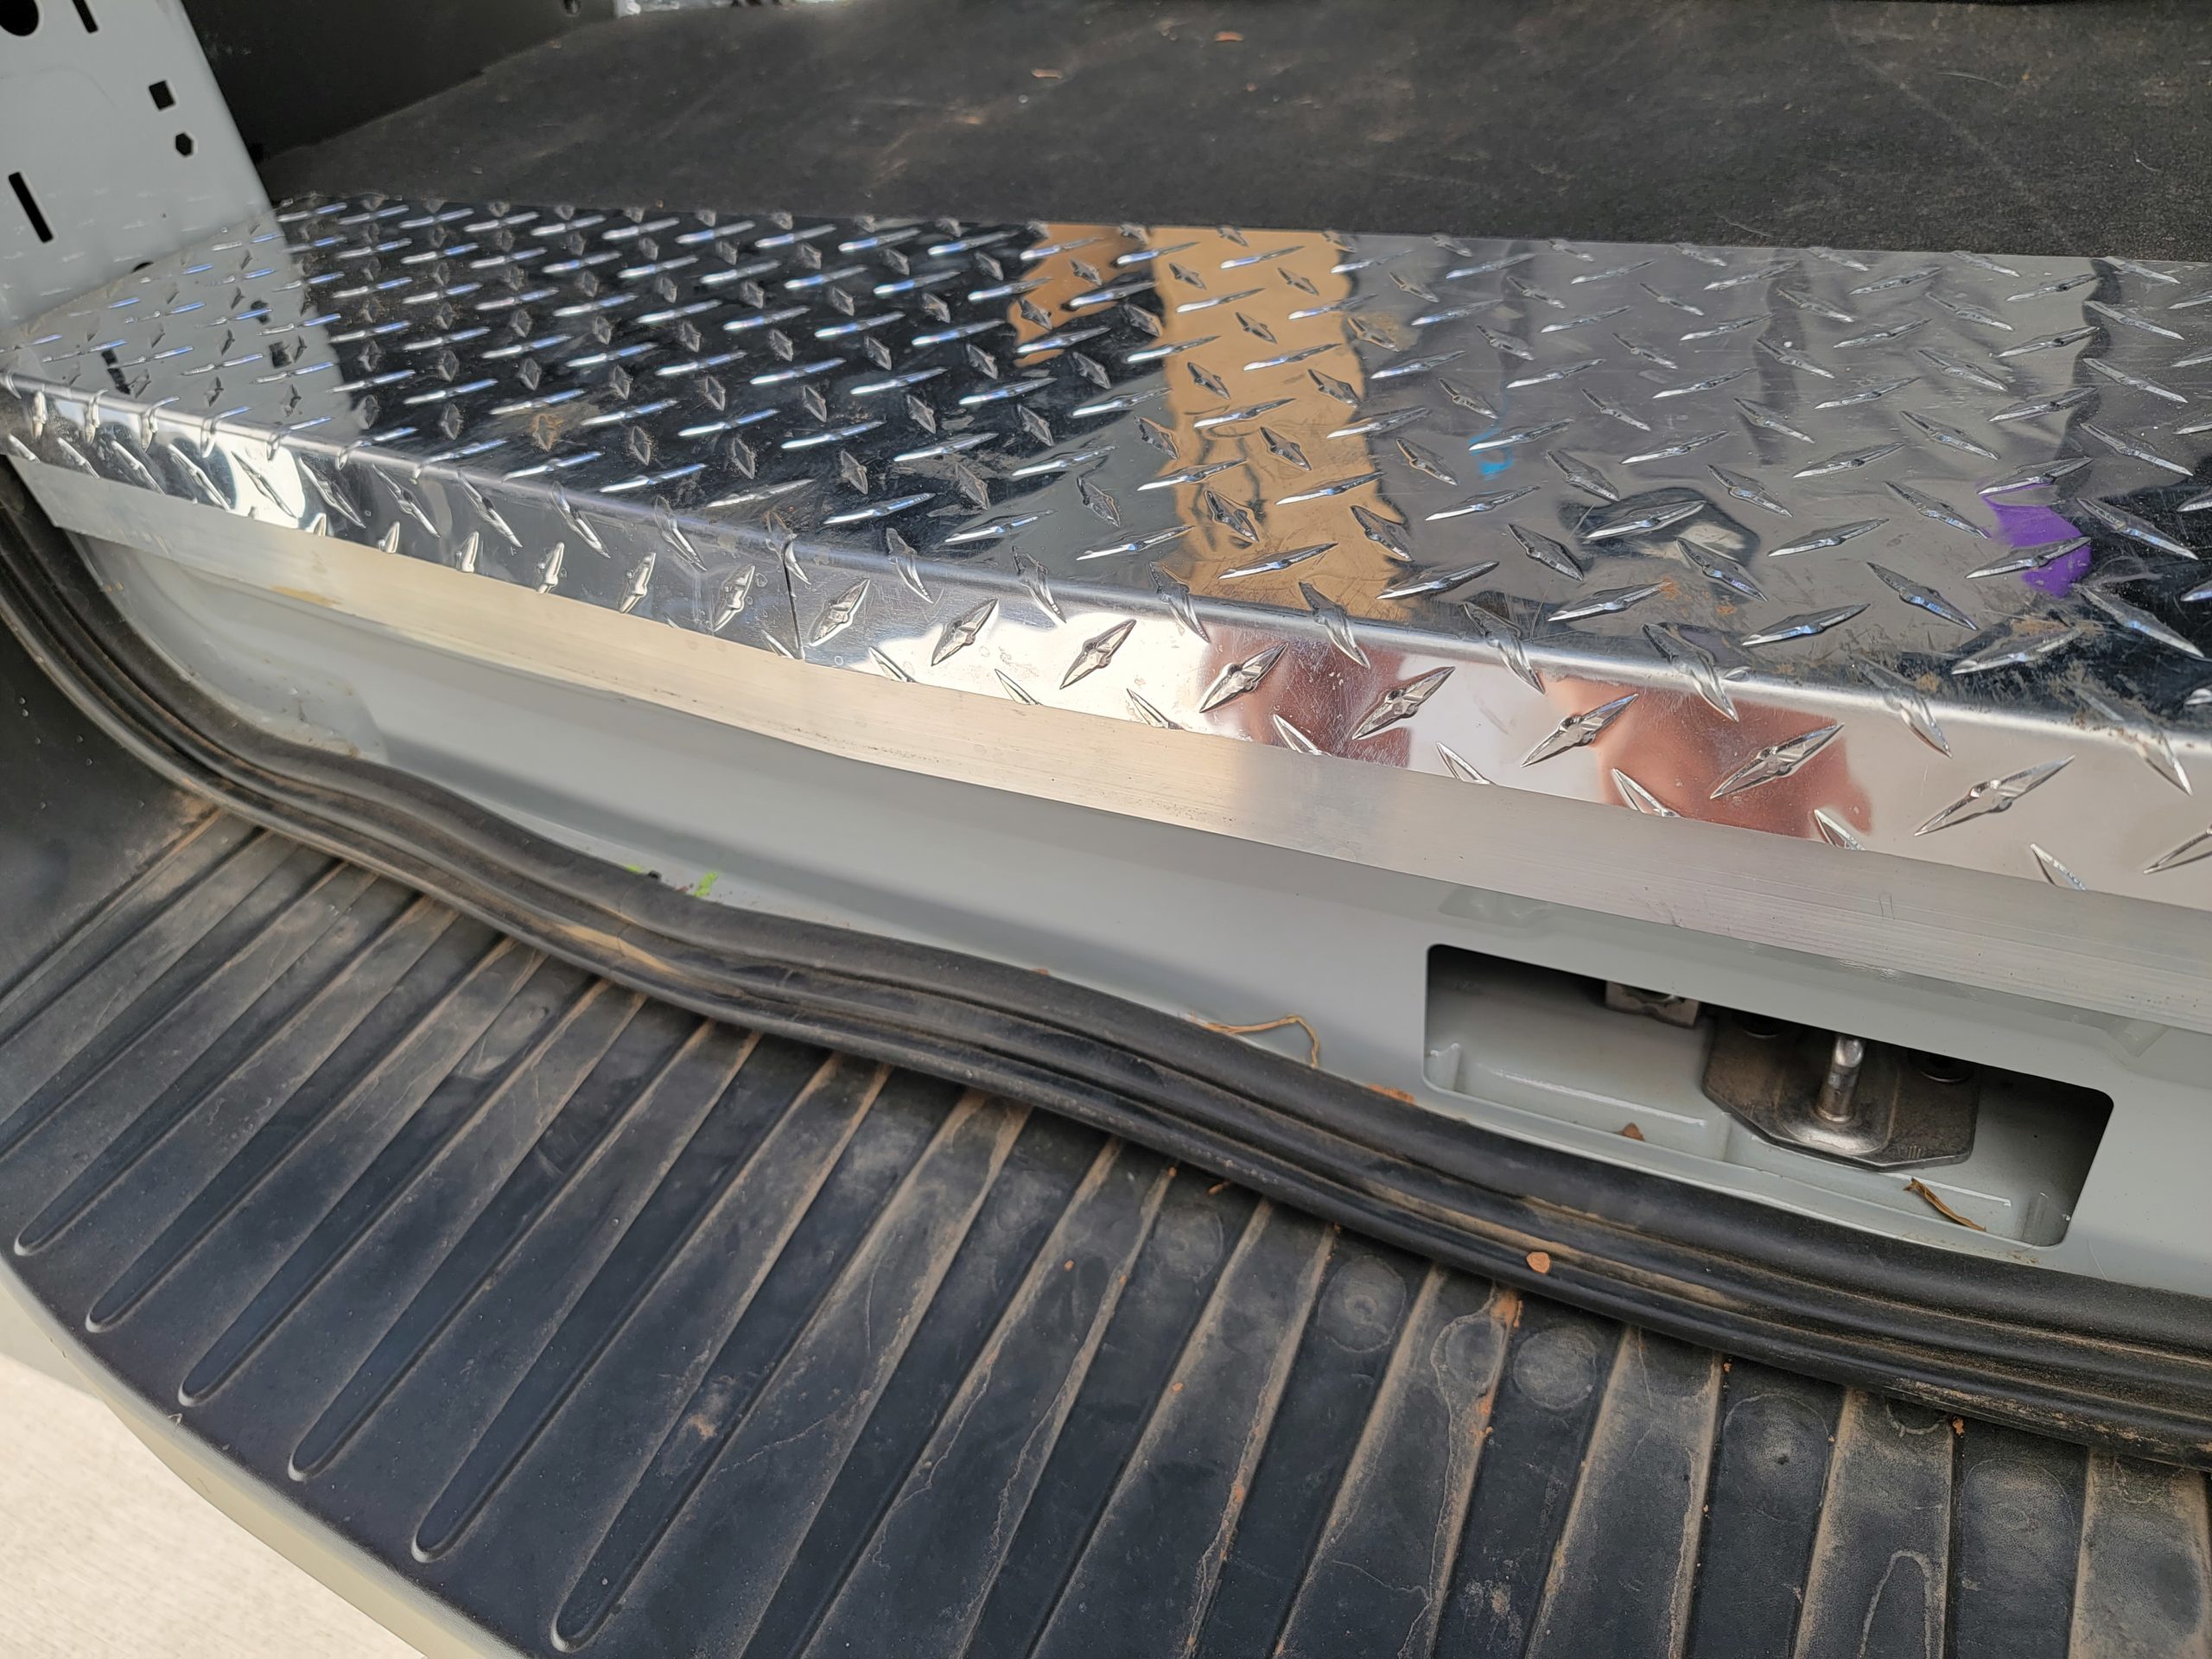
I had purchased the diamond plate sills with the Stabiligrip flooring by Legend Fleet (the sill will be installed after the Stabiligrip flooring is in. The one designed for the rear door area is designed well (the one for the side door had a small shortcoming – more on that later). However, because I had raised the floor by 3/4 of an inch the diamond plate flooring would have left a gap (not reached down vertically enough to completely meet the metal van flooring. This was an aesthetic that I solved with a piece of aluminum angle iron.
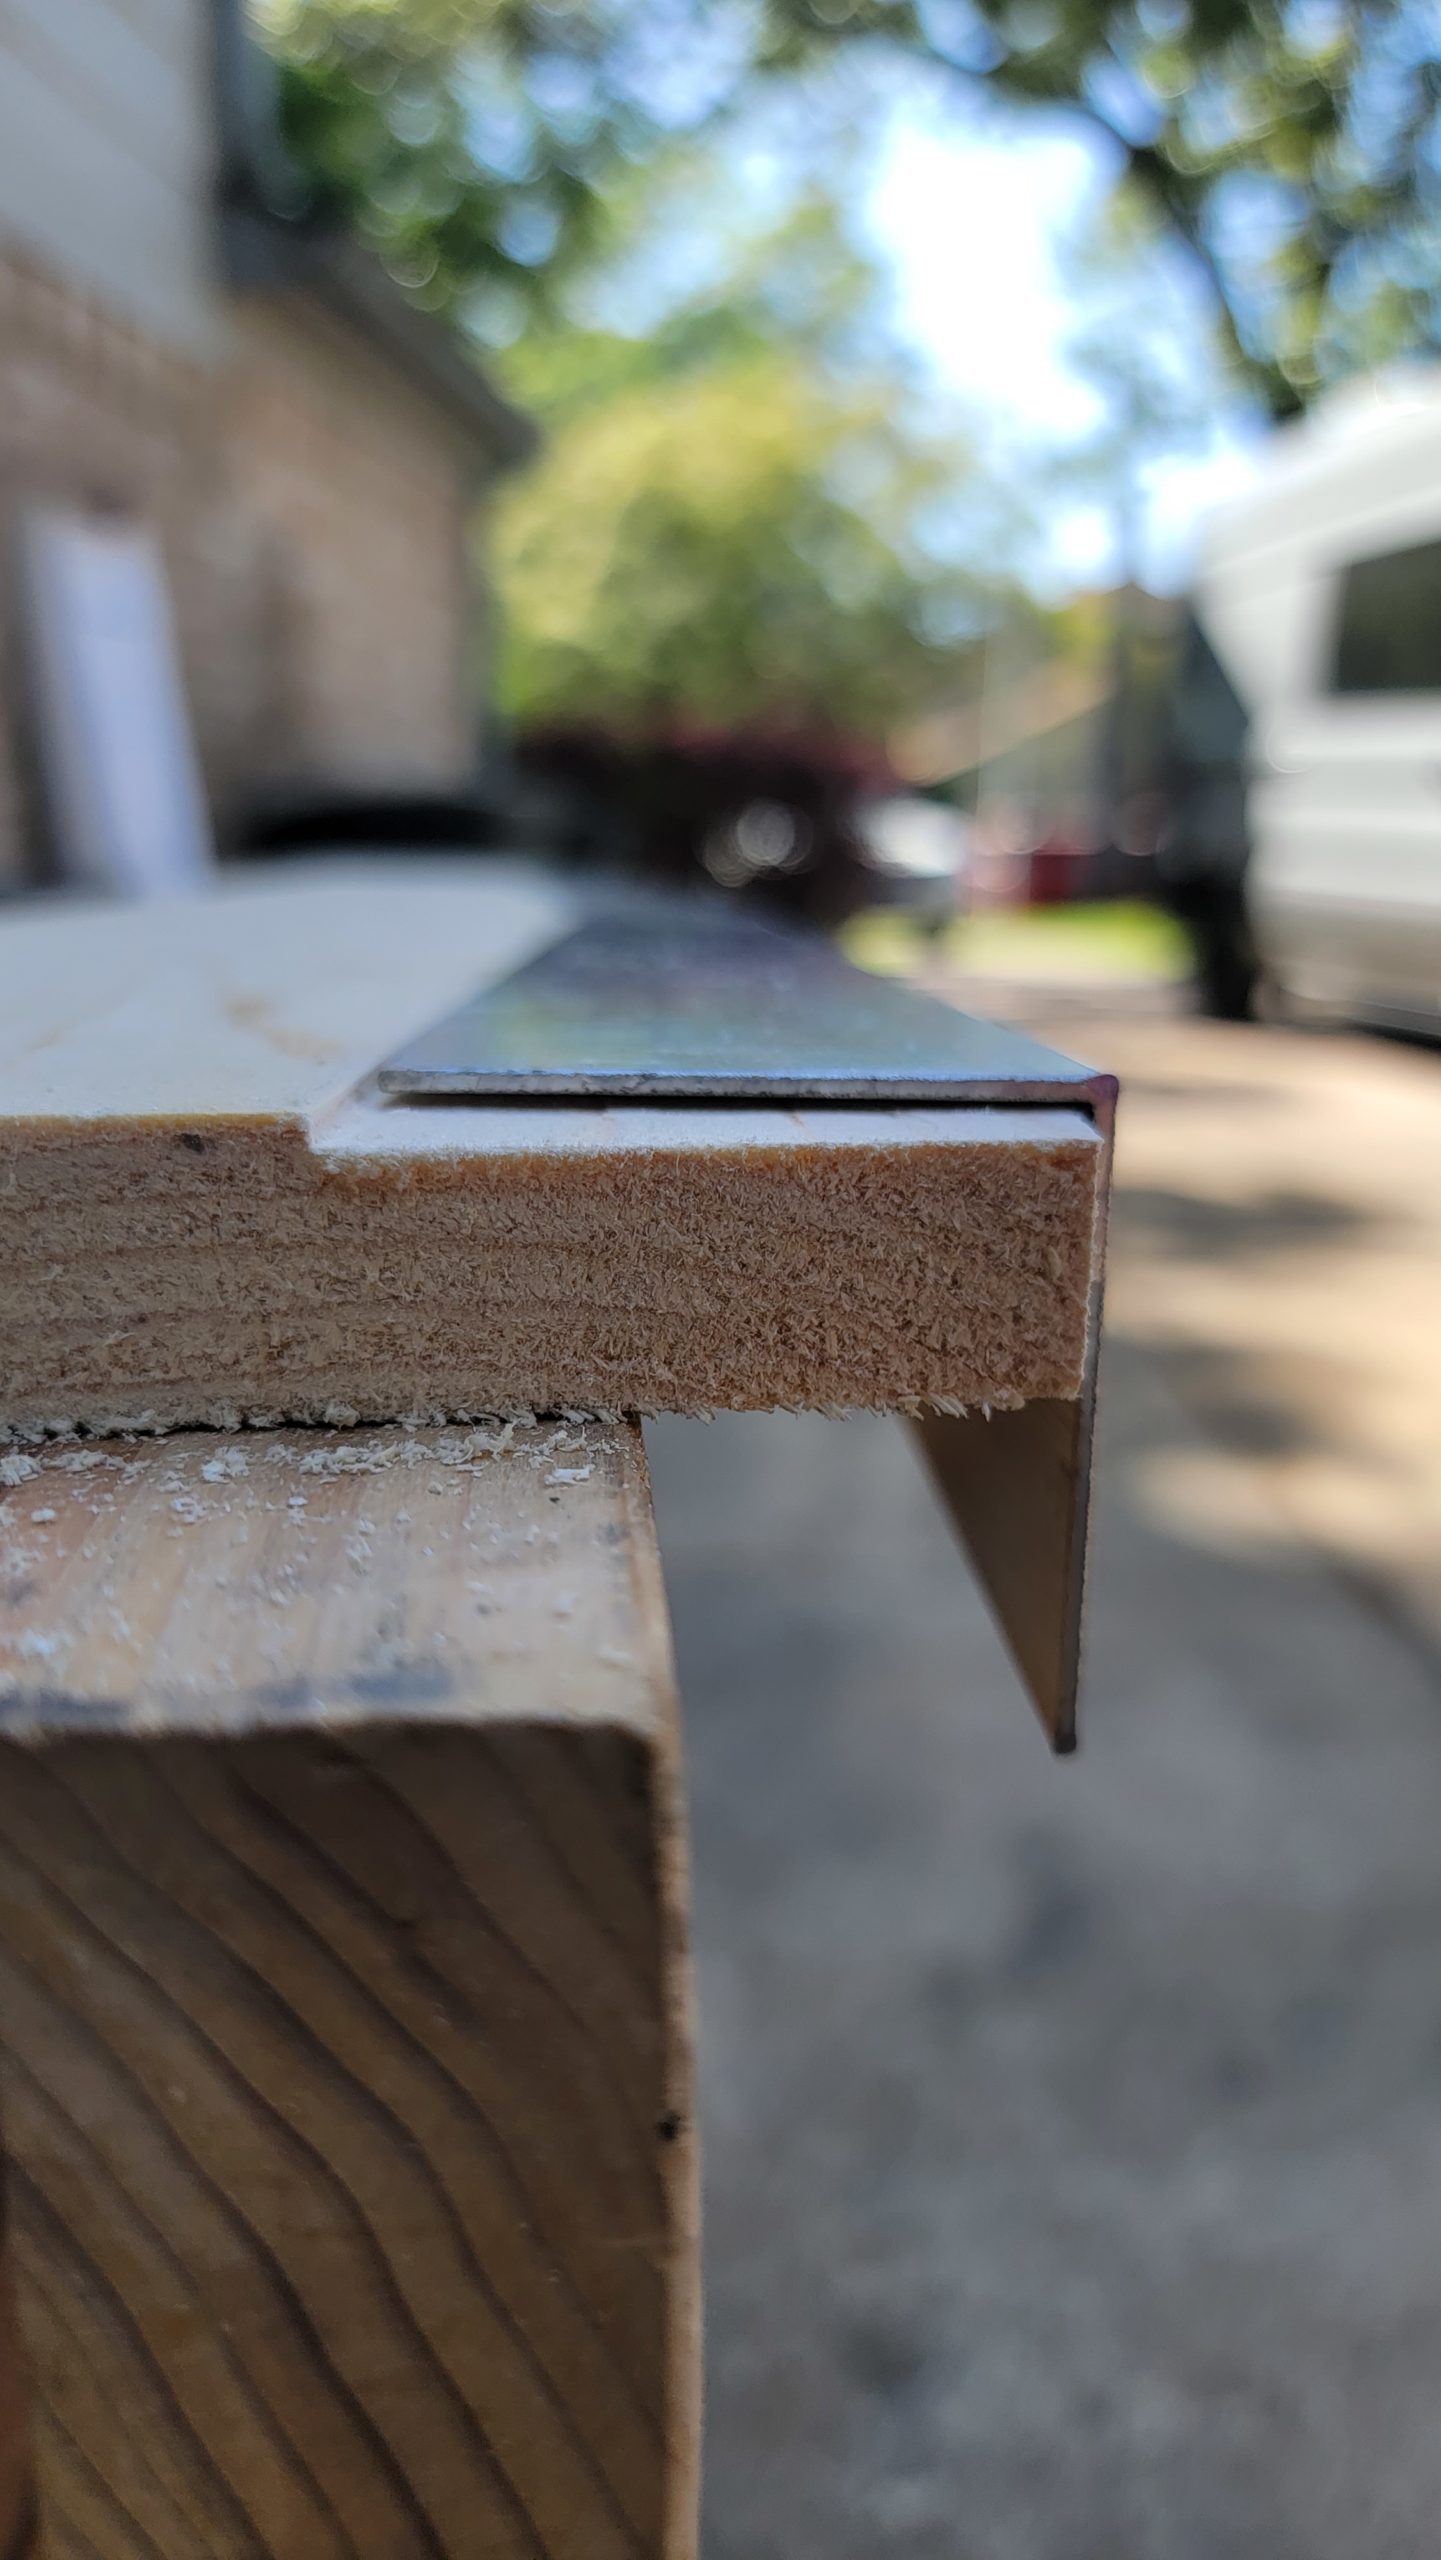


The 1 x 12 lumber was first cut to match the curve at the back of the van with two “bends”. Then routered to allow for the thickness of the aluminum angle metal. The aluminum needs to sit down into the wood so that the top of the aluminum is flush with the top of the wood. This way the solid Stabiligrip flooring has a smooth and level surface to sit on. The aluminum was notched to allow it to bend at two locations. Construction adhesive and clamps attached the aluminum to the wood.
If you are not raising the level of the floor then the sill that comes with the Stabiligrip kit will work fine and you can avoid the extra piece of angle aluminum as a trim piece.
The actual camper van floor
Patterning
Initially I found the idea of creating a pattern for the camper van floor daunting, so I opted for a pre-engineered flooring that came in 3 ready cut panels. The Stabiligrip floor I selected is awesome, but there was no need to stress over the patterning. In hindsight a more economical flooring material would work well and a cutting pattern would be easy to make.
There are nooks and crannies in that will need to be cut around, but you really do not want the flooring to sit too tight against the walls as it can squeak when you are driving. a reasonable gap will get covered up when you bring the walls and trim down against the floor anyway. The Stabiligrip is the final flooring – no need to treat it as subfloor and cover it or paint it as you would with plywood. Also the Stabiligrip came with very handy “joiners” to connect the 3 pieces and have a smooth transition.
Katie with US Upfitters was extremely helpful and I recommend giving her a call to check on availability and purchase the Stabiligrip camper van floor. It came in 3 large panels that were cut to fit this van. The fact that I had raised the position of the floor slightly altered the fit due to the slope of the wheel wells, etc. However, even at the normal height (positioned directly on the hills of the van floor) they would have had a little bit of play. In other words, you do not have to be super precise in patterning and cutting your floor panels. Once you install cabinets and wall material a small gap will be covered up anyway.
Composite material – Stabiligrip
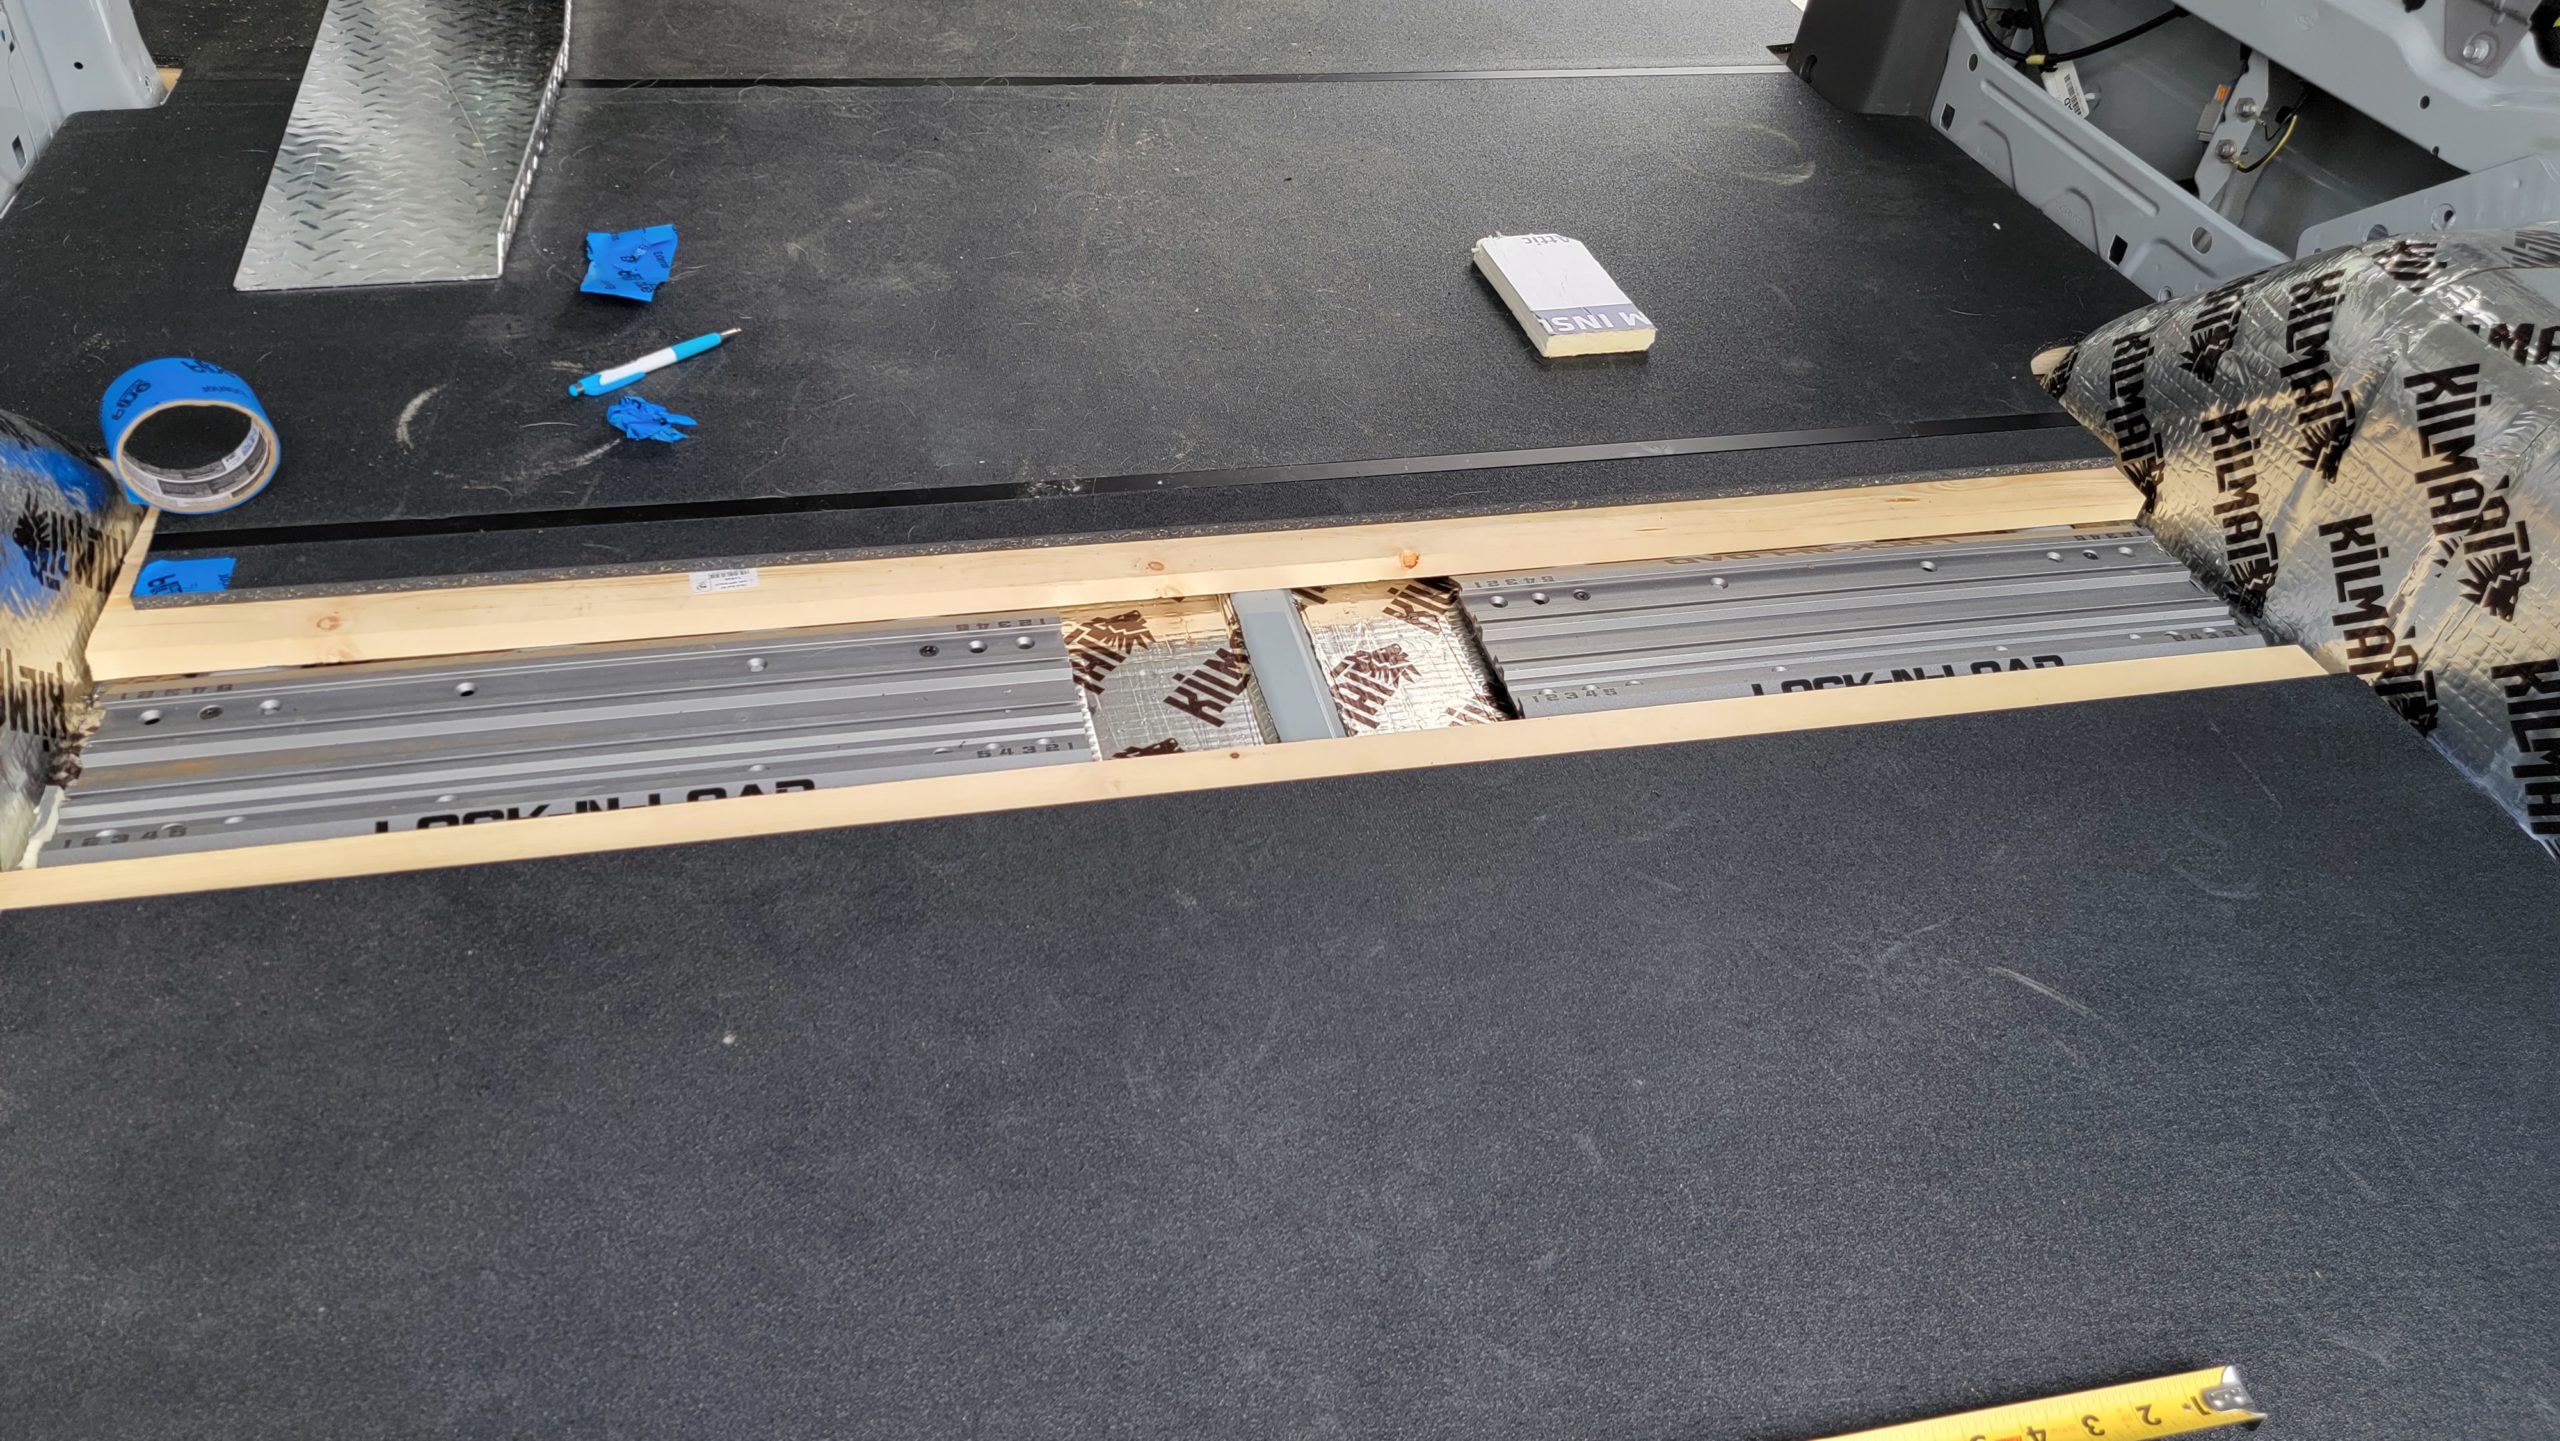
The Stabiligrip material is a composite and will not warp. It also provides a non slip surface that is the final flooring without any need for a vinyl covering. Because of the motorcycle mounts we did have to make a two lateral cuts to facilitate access to the Lock and Load mounts. It cut smoothly on a table saw and thankfully I had help from Robert and his staff at Beckwith’s Car Care.
The panels are large and require multiple people to handle well. The cuts went across the flooring and were cut to sit on the wood struts that flank the Lock and Load mounts. We installed two mounts so that dueling bikes can be loaded, however typically I’ll only carry a solo bike. So this piece of flooring was then cut in off center to allow for a smooth floor on the half of the van that does not have a bike loaded. Or…with both pieces in place you are not even aware that there are mounts under the floor.
Glue or Screw?
Again, I toyed with the idea of a temporary way to attach the flooring to the wood struts and decided to glue the panels to the struts. Of course the two pieces over the Risk Racing mounts are not glued down and can be lifted to access the mounts. This was a tricky process as 1/3 of the van floor required the adhesive to be in place prior to positioning the first panel. Then the subsequent areas needed glue and panels placed quickly so that the panels could slide into the double u channel joints before the adhesive hardened. You will definitely want a second person to help with the glue down phase.
If you chose to use plywood as the flooring you might want to consider screwing the plywood to the struts. It would take away a little of the stress of positioning everything quickly. Most folks then cover the plywood subfloor with something more decorative.

Side door sill for the camper van flooring
Update on this sill coming soon.